

Improving the Flavor of the Meat
Smoking Basics eCourse • Chapter 3 of 5
Smoke brings a lot to the table, but the seasoning you put on the meat before and during the cook has just as much to say about the finished flavor. A good rub, a sensible amount of salt and the right sauce can make a simple piece of meat something folks ask you to cook again.
You do not need to marinate, brine, inject, rub, mop and sauce every piece of meat. In this chapter, I’ll explain what each method is useful for so you can choose a few that work together, rather than piling on everything in the refrigerator and hoping it becomes a recipe.
Plan the Salt Before Adding the Flavor
The easiest seasoning mistake is using several salty ingredients without considering how they add up. A turkey with an added salt solution, a salty injection and a heavy coat of salty rub can end up with more salt than you intended, even if each step seemed reasonable on its own.
Read the meat label, taste your seasoning mixtures before they touch raw meat, and decide where the salt will come from. If the meat is already enhanced, self-basting or kosher, adjust the brine and rub to suit it instead of automatically following every salting step.
My Original Rub is very low in salt, and that was intentional. When I created it, I worked out the flavor of the spices first, then added just enough salt at the end to bring those flavors out. I wanted a seasoning you could use generously for flavor and bark without salt taking over the food.
Marinades: Flavor Mostly Near the Surface
A marinade is a seasoned liquid the meat sits in before cooking. It may include oil, vinegar or citrus juice, soy sauce, Worcestershire sauce, herbs, spices and other ingredients you enjoy. Most of those flavors stay near the surface, while salt can move farther into the meat over time.
Acidic marinades can change the texture of the outside, but they do not turn a tough brisket into a tender roast all the way through. Too much time in a strong acidic mixture can leave the surface soft or unpleasant, so follow a recipe written for the cut you are using rather than assuming longer is always better.
When I want something easy, zesty Italian dressing is one of the marinades I reach for. It gives you oil, acidity and seasoning in one bottle, and there is nothing wrong with keeping a weeknight cook that simple.
Use a food-safe bag or nonreactive container, keep the meat covered in the refrigerator, and follow the recipe’s timing. Reserve a clean portion before adding raw meat if you want some for serving or basting later. The easiest approach is to discard the used marinade; do not pour it over cooked food or use it as a table sauce.
Wet Brining: Salt, Water and Better Moisture Retention
Wet brining means soaking meat in a measured salt-and-water solution. It is especially useful for chicken and turkey, which do not have the same cushion of fat and connective tissue that makes a pork butt forgiving.
Salt changes how the meat’s proteins interact with water, helping the meat hold onto more moisture during cooking. That gives you a little more room for error, but it does not make overcooking impossible or mean every flavor in the brine travels equally deep into the meat.
Sugar, herbs and other seasonings can add something to a brine, but get the salt concentration right before experimenting. Follow a tested recipe for the salt brand, amount of water and brining time, because one cup of coarse salt can weigh quite differently from one cup of another kind.
Keep the meat and brine refrigerated at 40°F or below, use a food-safe container large enough for the job, and cool any heated brine completely before adding raw meat. Do not leave a turkey in a bucket on the counter overnight and count on the salt to protect it.
My chicken brining guide gives you a practical starting point. For a turkey that already contains added salt, decide whether an additional brine is needed before mixing one up.
Dry Brining: The Same Salt with Less Equipment
Dry brining uses a measured amount of salt directly on the meat instead of dissolving it in a separate container of water. My step-by-step guide to dry brining a turkey shows how I put this into practice. The salt draws moisture to the surface, dissolves in that moisture and gradually moves into the meat.
It is a useful approach for steaks, chops, poultry and larger barbecue cuts, and it saves you from finding refrigerator space for a whole tub of liquid. It can also help the surface of poultry dry when the recipe calls for an uncovered refrigerator rest.
You will often see about ½ teaspoon of coarse kosher salt per pound suggested as a starting point for dry brining, but the type of salt and your own taste matter. Different brands pack different amounts of salt into the same measuring spoon, so that is a starting guideline rather than a number to apply blindly to every salt and every cut.
Personally, I generally use closer to 1 teaspoon per pound because that is how my family and I like it. I consistently use Morton’s coarse kosher salt in the blue box for my dry brining, so that preference is based on that particular salt, not a promise that the same spoonful of another brand will give you the same result.
I like its flake texture and find that it dissolves well for the way I use it. More than anything, using the same salt over time has taught me how much to apply to get the flavor I want, and that consistency makes the results easier to repeat.
Use a salt you enjoy, learn how it seasons the meat and adjust for your taste and your family’s taste over several cooks. If you are just starting, begin with the smaller amount in a recipe written for your salt and work toward your preference instead of assuming my heavier application is where you need to begin. Keep notes, and reduce or skip additional salt when the meat already contains an added salt solution.
This is one reason I like using my Original Rub on meat that has already been dry brined, wet brined or marinated: its very low salt content lets me add the spice flavor I want without piling on another heavy layer of salt. It does contain some salt, so the total still matters, but I know how my own recipe behaves. If you use a different rub, check its ingredients and sodium information and adjust the amount rather than assuming it will work the same way.
For a closer look at the tradeoffs, read my wet brining vs. dry brining guide. Both methods work, and the better choice is the one that suits the recipe, the meat and the refrigerator space you actually have.
Injecting: Put the Flavor Where You Want It
An injector places liquid inside the meat with a food-safe needle and syringe. If you are considering it for pulled pork, read my guide to whether to inject a pork butt before adding that step. It is a quick way to distribute seasoning beyond the surface, although the result depends on the liquid, the amount and where you place it.
A prepared injection is an easy place to start, or you can use a recipe based on broth, melted butter, juices or other compatible ingredients. Strain out particles that will clog the needle, and keep the seasoning balanced with any brine or rub you are also using.
Pour the amount you need into a separate clean container so the injector does not carry raw meat juices into the original bottle. Insert the needle into a thick section, press the plunger gently while withdrawing it partway, and distribute small amounts through several areas rather than forcing one large pocket of liquid into a single spot.
Use the recipe’s amount as your guide and stop if the liquid is simply running back out. Do not taste an injection mixture after a used needle has been dipped into it, and clean and sanitize the injector according to its instructions when you finish.
Injecting can move surface bacteria into the interior, so keep everything cold, inject close to cooking time and use a recipe and safe temperature guidance appropriate for injected meat. It is an optional tool, not something you must do to make good barbecue; for a beginner’s turkey, I would usually choose a suitable brine before adding another step.
Dry Rubs and Binders
A dry rub is a blend of seasonings applied to the outside of the meat, and it is my favorite way to build a flavorful crust. Salt, pepper, paprika, garlic, onion, sugar and other spices each bring something different, and the right balance depends on the food and the cooking temperature.
I often use a very thin layer of yellow mustard to help the rub stick. After a long cook its flavor is usually not noticeable, but the seasoning stays on the meat. Oil or simply the meat’s own surface moisture can also work, and a binder is not required if the rub is already adhering well.
Pat away excess surface liquid, apply the binder lightly if you are using one, then sprinkle on an even coat of rub. Let it sit while the smoker finishes preheating, or refrigerate it if the recipe calls for seasoning ahead. You do not need to grind the spices into the meat or leave it sitting on the counter to “absorb” them.
Go more lightly on a salty blend or a thin piece of meat, and be aware that sweet rubs can darken quickly over direct high heat. For ribs and pork butt, a steady indirect cook gives the seasoning time to become part of the bark.
When I call for a generous coating of my Original Rub, that very low salt content is part of the reason. If you are substituting a different blend, use its salt level to guide you rather than automatically applying the same amount. I can tell you how my own rub works, but I cannot make that promise for every other rub on the shelf.
If that sounds useful for the way you cook, you can get my Original Rub already bottled, or use my Original and Texas Style Rub master formulas to make your own. Either way, the idea is to build the flavor you want while staying in control of the salt.
Barbecue Sauce: Add It When It Helps
My Original Barbecue Sauce is the sauce I use in my own cooking, and I often serve it warm and on the side with ribs, pulled pork or chicken so everyone can decide how much they want. Good smoked meat does not need to be buried in sauce, but a little alongside gives folks another way to enjoy it.
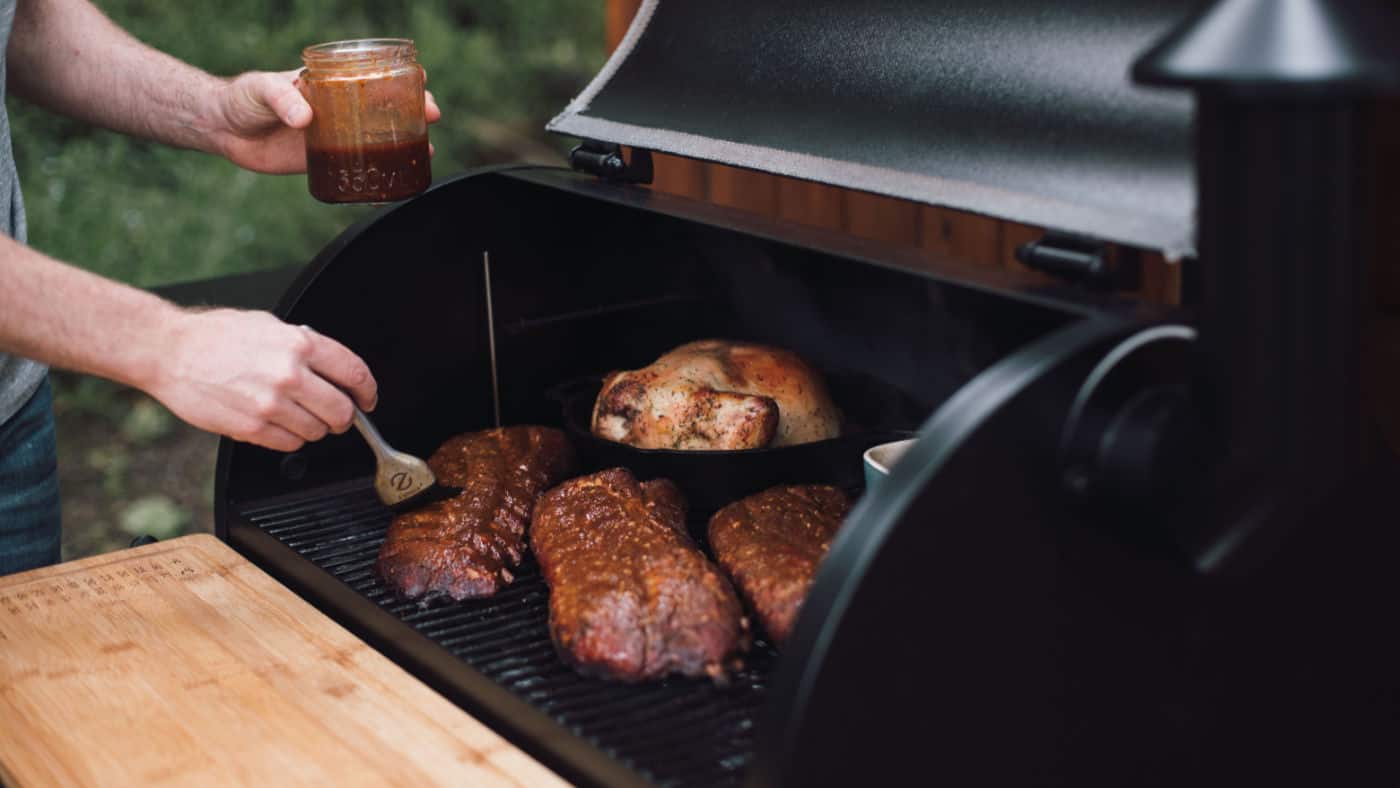
For sweet sauces on ribs or chicken, I usually wait until near the end of the cook and brush on a thin coat. Give it enough time to set without letting the sugars scorch, particularly if you are finishing over hotter heat.
For a glaze, I like mixing a little honey into my Original Barbecue Sauce and brushing on a thin coat near the end of the cook. Start with a small amount of honey and taste it before adding more, since you are looking for a balance you enjoy. Use a clean serving portion at the table, separate from sauce and brushes that have touched undercooked meat.
If you enjoy making your own sauce, my Original Barbecue Sauce master formula lets you make it at home. The bottled sauce is simply the convenient option when you would rather spend that time getting the rest of dinner ready.
Mopping and Spritzing
A mop is a liquid brushed onto the meat during cooking, while a spritz is applied with a food-safe spray bottle. They can add surface flavor and moisture, but they do not seal in juices or rescue meat that has cooked beyond the texture you wanted.
Wait until the rub has begun to set before brushing or spraying, and use a light hand so you do not wash off the seasoning. If the surface looks good and is not drying excessively, there is no requirement to keep wetting it on a timer.
Opening the smoker too often releases heat, and repeated wetting can slow bark development and extend the cook. Make each trip count, close the lid promptly, and use a brush or bottle suited to the liquid. Melted butter mixtures are generally easier to brush than to force through a sprayer.
My butter and rub mop sauce is one option when you want a little extra flavor. Keep a clean portion separate and avoid carrying raw meat juices into liquid you plan to serve later.
Your Chapter 3 Assignment
Choose one meat and decide on a simple seasoning plan. For example, a pork butt might need only a thin binder and a balanced rub, while unenhanced chicken might benefit from a measured brine followed by a lighter-salt seasoning.
Write down what you use and how much, then ask the people eating it what they would change. If the meat needs more pepper or less sweetness, adjust that one thing next time instead of rebuilding the entire recipe.
Watch for tomorrow’s email: In Chapter 4, we’ll look at smokers, thermometers and the equipment that makes cooking easier, including what you need now and what can wait. I’ll send the link in your next course email.
