

The Ultimate Guide to Smoking Pork Ribs: From Choosing the Cut to Serving

I may earn a commission if you buy through links on this page, at no extra cost to you.
Pork ribs are one of my favorite things to cook in the smoker, and over the years I have learned that turning out a good rack has a lot more to do with understanding what the ribs need than following a certain number of hours on the clock. Once you know how to choose them, prepare them and recognize when they are tender enough for the way you like to eat them, the process becomes a whole lot easier.
$19/year
Less than $1.60 a month, billed annually.
Renews yearly until canceled.
Already a member? Log In
In this guide, I will walk you through smoking baby back ribs, spare ribs and St. Louis style ribs from the grocery store to the cutting board, with links to more detailed instructions whenever there is something that deserves a closer look. We will also cover where country style ribs and rib tips fit in, since everything labeled “ribs” does not necessarily cook the same way.
Jump to a Section
Choosing Ribs · Planning the Cook · Preparing the Ribs · Seasoning · Setting Up the Smoker · Smoking and Wrapping · Doneness · Serving · Troubleshooting · Rib Recipes
Choosing the Right Pork Ribs
Baby back ribs, also called loin back ribs, come from the upper part of the rib cage near the backbone and have shorter, curved bones. Spare ribs come from farther down toward the belly and have longer, flatter bones, with a section of cartilage and rib tips along one edge. St. Louis style ribs are spare ribs with that irregular section trimmed away, leaving a more rectangular rack that is easy to handle and slice.
All three work well in the smoker, and I would rather see you buy a good, evenly meaty rack of whichever cut you prefer than get hung up on which one someone else says is best. Look for good coverage over the bones, reasonably even thickness and no large areas where the bones have been exposed by close trimming, sometimes called shiners. Also read the package for added solution so you know whether you are starting with pork that has already been salted.
Baby backs often finish sooner than spare ribs, but some of the extra meaty baby backs in the stores have enough loin meat attached to keep you waiting just as long. Our pork rib buying guide explains the differences and what to look for before you put a rack in the cart.
Country Style Ribs and Rib Tips
Country style ribs need their own instructions because they may be cut from the shoulder or the leaner loin, and those two cuts do not have the same tenderness target. If that is what you purchased, start with my smoked country style ribs recipe, which explains how to tell them apart.
Rib tips are the meaty, cartilage-containing section removed when spare ribs are trimmed St. Louis style, and they are well worth saving. You can cook them alongside the rack and check them separately, or use my smoked rib tips instructions for a cook devoted to the trimmings.
Plan the Cook Before You Light the Smoker
For a straightforward rib cook, I recommend getting the smoker settled between 225°F and 240°F (107°C and 116°C), which gives you time to build smoke flavor and tenderness without rushing the outside of the rack. At those temperatures, baby backs often take about 4 to 6 hours and spare ribs or St. Louis ribs about 5 to 7 hours, although thick racks, your wrapping choice and the way your smoker cooks can move those times in either direction.
Use those ranges to decide when to start, then let tenderness decide when to stop. Build in some extra time rather than planning to pull the ribs off at the exact moment everyone sits down, and remember that preheating, preparation and resting are separate from the cooking time. My rib time and temperature guide explains how to use those estimates without turning them into a promise.
When ribs are the main meat, half a rack per adult is a useful starting point, with adjustments for rack size, appetite and how much other food you are serving. Before buying a stack of racks, make sure they will fit with space for heat and smoke to move around them; the rib planning guide covers portions, smoker space and holding ribs that finish early.
Prepare the Ribs for Smoking
Thaw frozen ribs in the refrigerator before the cook, then remove the packaging and pat the meat dry with paper towels. There is no need to wash the ribs under the faucet, and keeping the preparation on a rimmed pan or a cutting board inside a tray helps contain the mess.
If you are starting with ribs that are still frozen, I also have a frozen ribs in the smoker recipe that walks through the way I cook them straight from the freezer. Follow that recipe for the cooking setup and sequence, since it is a different starting point from the thawed racks covered here.
Baby backs usually need only a little attention to loose edges or unusually thick surface fat, while full spare ribs give you a choice between smoking the whole slab and trimming it St. Louis style. Neither choice is required for good barbecue, but trimming makes the rack more uniform and gives you some useful pieces to cook separately.
Trimming Spare Ribs
On the bone side, remove the loose flap of meat if it is still attached, then feel along the rack to locate where the hard rib bones end and the cartilage section begins. Make your trimming cut through that softer area rather than trying to force a kitchen knife through solid bone, and keep the meaty trimmings for rib tips, beans or a cook's snack.
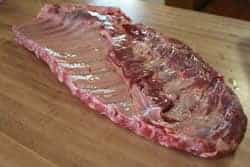
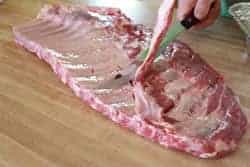


If you have not done this before, follow my step-by-step spare rib trimming instructions, which explain how to find the cutting line without removing more meat than necessary.
Removing the Membrane
I generally remove the thin, tough membrane from the bone side because I prefer the way the finished ribs eat without it. Work the end of a butter knife or spoon underneath it over one of the bones, lift enough to grab, then use a paper towel to help pull it away from the rack.


Sometimes it peels off in one satisfying sheet and sometimes it comes off a little at a time, which is fine. If you cannot find anything to lift, it may already have been removed; the rib membrane guide covers that situation as well as the stubborn ones.
Add the Seasoning
My original rub is very low in salt, with just enough to bring out the flavor, so you can be generous with it on pork ribs without making them too salty. Coat both sides and the edges as heavily as you like, using a thin layer of yellow mustard to help it stick if you want a binder, although the natural surface moisture will also hold the seasoning.
Mustard is only one option, and in the pictures below I used two parts seedless blackberry jam mixed with one part Dijon mustard for a different flavor underneath the rub. You do not need a heavy coating of either one, since the idea is to help the seasoning stay in place rather than give it something to slide off of.


Plain yellow mustard works as well if you want to keep things simple, as shown here.


You can season the ribs while the smoker heats, or prepare them the night before and keep them refrigerated until cooking time. My original rub also works well after wet or dry brining because its low salt content does not pile on another heavy layer of salt; if you use a different rub, check its salt level before combining it with a brine or separate salt layer. My rib seasoning guide covers that part in more detail, along with spritzing and saucing.
Get the Smoker Ready
Set up for indirect cooking, with the ribs protected from the strongest direct heat, and use a grate-level thermometer near the food to see what temperature the ribs are actually experiencing. On a grill, that means a cooking area away from the lit burners or charcoal, while a smoker may use a heat deflector or water pan as part of its normal arrangement.
Use the water pan in a smoker designed around one, filling it with water rather than using up juice that could go into a marinade or brine. I do not generally find a water pan necessary on a pellet grill, although you can use a shallow pan below the grate on top of the main heat deflector if you want one, provided it fits without interfering with airflow or grease drainage.
Pecan, cherry, apple and hickory are all good choices for ribs, and there is nothing wrong with using the smoking wood you already enjoy. Aim for a clean-burning fire rather than thick, lingering smoke, and add wood in amounts your smoker can burn cleanly instead of trying to make the ribs disappear in a cloud.
If you need help with your particular cooker, start with the Smoker Guide, or go directly to the instructions for a pellet grill, electric smoker, kettle grill or gas grill.
When the Racks Will Not Fit
You can cut a rack in half between the bones without hurting the cook, which is often the easiest answer in a smaller cabinet smoker. A rib rack also lets you hold slabs upright, as long as there is room between them and they are not pressed against the walls or crowded together.
Another option I have used is rolling a slab into a loose barrel shape and holding it with butcher's twine or a skewer, leaving the center open rather than packing the meat into a tight bundle. Lay it flat when it is time to check tenderness, wrap or finish the rack.


Smoke the Ribs and Decide Whether to Wrap
Place the ribs on the grate bone side down and close the lid, keeping them over indirect heat while the surface takes on smoke and the rub begins to form a bark. There is no need to turn them over repeatedly, although rotating racks or swapping positions can help if one part of the smoker runs hotter than another.
For the first couple of hours, concentrate on maintaining the cooker rather than opening it every few minutes to see what is happening. When you do check, look for even color and a surface where the rub has set instead of wiping away at a touch, and move a rack if its edges are darkening much faster than the rest.
Wrapped Ribs
Wrapping in foil traps moisture around the ribs and helps them become tender, usually with a softer bark than an unwrapped cook. The familiar 3-2-1 method is three hours unwrapped, two hours wrapped and one hour back out of the foil, traditionally used as a starting point for spare ribs around 225°F.
Those numbers are useful for explaining the stages, but the rack still gets the final say. A thin rack may be tender before two wrapped hours are up, and ribs that are already finished do not need another full hour just because there is a “1” left on the schedule. For baby backs, 2-2-1 is another common starting point, with the same need to check and adjust.
My 3-2-1 rib instructions explain how to work through those stages, and the wrapping guide compares foil, butcher paper and leaving the ribs unwrapped.
Ribs Without Wrapping
You can also leave the ribs on the smoker until they are tender without wrapping them at all, which keeps the surface exposed to the heat and smoke throughout the cook. This usually produces a firmer bark, and it calls for watching the thin edges and checking tenderness as the rack approaches the finish.
If that sounds like your kind of rib, follow the no-wrap rib instructions. Neither method requires constant spritzing, and if you do use a light mist on a dry area, wait until the rub is set and avoid soaking the surface every time you open the lid.
Adding Sauce
If you want sauced ribs, apply a thin coat toward the end of the cook and give it enough time over indirect heat to turn tacky, often about 15 to 30 minutes. More sauce can be served at the table, and you can also leave the rack dry if you prefer the rub to do the talking.
Be careful with a sugary sauce over direct heat because it can go from glossy to burnt before the meat has a chance to improve. If the ribs are already as tender as you want them, keep the sauce-setting step brief rather than overcooking the rack to follow a schedule.
How to Tell When the Ribs Are Done
A rib that needs more cooking and one that has cooked too far can both disappoint you, so this is where paying attention makes a difference. The clock tells you when to start looking, while a thin probe between the bones, the way the rack bends and, when needed, a taste from an end rib tell you how the meat is doing.
For tender pork ribs, my target is 195°F (91°C), which has given me repeatable results time after time. Use a thin-tip thermometer in the thick meat between the bones without touching bone, then check the tenderness as you reach that temperature. The probe feel and the way the rack bends help confirm the result, while the temperature gives you a dependable target to use again on the next cook.
For ribs with a clean bite, you want the meat to release where you bite without the entire bone pulling free. For fall-off-the-bone ribs, you will cook them farther until the connective tissue has softened enough for the bones to release very easily, which is a perfectly reasonable choice if that is how you and your family like them.
Bone pullback and surface color are helpful observations, but neither one proves a rack is tender. My rib doneness guide explains how to measure the 195°F target and use the tenderness checks alongside it.
Rest, Slice and Serve
Once the ribs are done, let them rest briefly, usually about 10 to 15 minutes, so they are easier to handle and a little more pleasant to eat. If they have just come out of a tight foil wrap, open it carefully to release the steam rather than leaving a very tender rack sealed up and continuing to soften.
To slice them, turn the rack bone side up so you can see where the bones run, then cut between them with a sharp knife. Support a soft rack with a wide spatula or a second set of tongs when moving it, since grabbing one end of fall-apart ribs is a good way to leave the other end behind.
If dinner is still an hour away, use the resting and holding instructions rather than leaving the ribs sitting on the counter. For another day's meal, my storage and reheating guide explains how to cool, package and warm them without giving up more moisture than necessary.
When the Ribs Do Not Turn Out as Planned
Tough ribs often need more time, but first check whether you are dealing with meat that is still firm and connected or meat that has become dry and crumbly from too much cooking. Foil and a little moisture can help an under-tender rack finish, while continued cooking will not put lost moisture back into an overcooked one.
Mushy ribs usually need less time in the wrap or less cooking overall on the next batch, while a burnt exterior calls for a closer look at direct heat, the grate temperature and when the sugar-heavy ingredients went on. A bitter surface can point to a dirty fire or excessive smoke, which is a different problem from good, dark bark.
The rib troubleshooting guide walks through these problems individually, including what you can do during the cook and what to change next time.
Find Your Next Rib Recipe
If you want a rack with a clean bite, start with my smoked baby back ribs, or choose the spare ribs that literally fall apart if that is the texture you are after. For the foil method with detailed recipe instructions, try these 3-2-1 St. Louis spare ribs.
For something a little different, my Texas style pork spare ribs take the savory route, Buffalo Party Ribs give you individually cooked ribs with Buffalo sauce, and honey barbecue ribs head in the sweet and sticky direction.
Browse All Pork Rib Recipes · Baby Back Rib Recipes · Spare Rib Recipes · St. Louis Rib Recipes · Country Style Rib Recipes
You can also browse all rib how-to guides when you need help with a particular part of the process. If you bought beef ribs instead, those have their own beef rib recipe collection, with instructions suited to those cuts.
Don’t Lose This Article
Enter your email and I’ll send a link to this article straight to your inbox so you can read it anytime.
Join the Smoking Meat Community
Have a question about this technique or want help with your next cook?
Join the conversation with other backyard pitmasters.
From my backyard to yours
Jeff’s Handcrafted
Seasoning and Sauce
The rubs and sauces I use in my own backyard
and throughout these recipes.
CLASSIC BARBECUE
Original BBQ Sauce
Rich tomato flavor, balanced sweetness and a gentle kick.
$8.99per bottle
Shop Now
THE SIGNATURE BLEND
Original Rub
Sweet, savory and a touch of heat for your next cook.
$8.99per bottle
Shop Now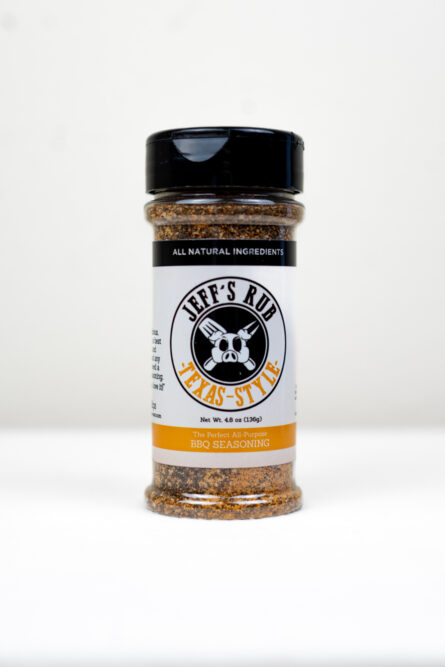
BOLD & PEPPERY
Texas Style Rub
Pepper forward flavor for brisket, steaks and more.
$8.99per bottle
Shop Now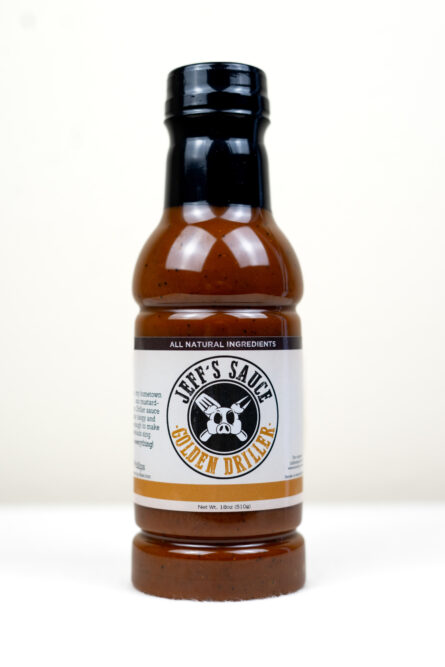
MUSTARD BBQ SAUCE
Golden Driller
Smooth mustard tang with just the right sweetness.
$8.99per bottle
Shop NowFind your next favorite at Thin Blue Foods

Making brisket bone using 3 2 1 for the first time read the notes that you recommend thanks for the tips. .. it’s snowing outside and the pellet smoker is on and the winter day is smelling good….
Great advice
So glad that I found this site! I own a restaurant and am looking forward to trying out your techniques. One question though, Do you have any experience with a pressure smoker? It works wonders on my pulled pork and brisket but am having issues with my ribs. They are coming out a little tough and dry. I read all the above information, but was wondering if you have any times for a smoker like this. (I can do 6 8-10 lb pork butts in about 4 hours,) Thank you so much!
Today I am trying a variation on the 321 method. My wife likes to parboil ribs so I will try this. 2 hr smoke, 3 hr in foil, 1 hr uncovered. I am hoping this will produce the fall off the bone effect she likes with the great smoke flavor. I will let you know the outcome. By the way I will be trying the rib rub for the first time. Looking forward to it !!
Last night I tried a variation of Jeff's 2-2-1 recipie for baby backs in my medium Big Green Egg and they came out fantastically well. There were no leftovers! I use a slightly higher temperature of 250º for my cook. After 2 hours I wrapped my ribs in heavy duty aluminum foil, but instead of using apple juice, I sprinkled them liberally with dark brown sugar and topped that off with margarine before I closed them up and returned them to the BGE for another hour. (I use Parkay from a squeeze bottle for ease of application.) After one hour (not two) I unwrap them and put them back in the BGE, unwrapped, for another hour. I coat them with Jeff's BBQ sauce 20-30 minutes before they come off.
So I guess you could call this Bocaboy's 2-1-1 recipie as opposed to Jeff's 2-2-1. The extra 25º is what I think shortens the cooking time for the middle step. I find that if the ribs stay in foil too long, all of the rub is washed off by the steam that's generated by the apple juice or brown sugar and margarine. Even with no added liquid or spice, the pork will leech out moisture and steam the meat. The ribs may be tender, but IMHO they also lose flavor. My "secret" to avoid that is to use Jeff's rub and let the ribs sit in plastic wrap overnight. That allows all of the spices to seep into the meat and add flavor that isn't just sprinkled on top.
You might think that these ribs would be too sweet, but the margarine and sugar quickly melt together and steam the sweetness into the meat. Combined with Jeff's rub, the combination is delicious. I've also seen on Pitmasters where cooks use a combination of dark brown sugar and honey, along with the margarine, but since this was my first time trying this method, I was a bit shy about they're coming out too sweet.
I have used the 2-2-1 & 3-2-1 method of yours now for 2 years. Tomorrow is St Louis style ribs using the 3-2-1 method w/ the jam as reccomended. I alternate from Apple, Pineapple, Mango and Guava juices on step 2. Tomorrow is the Guava's turn in the smoker. Each juice adds its own unique flavor and it is fun to experiment. Over the years I have found that I can't detect any flavor enhancement by placing the dry rub on 24 hrs in advance. So I now just do it 1 hr before smoking.
Thanks Jeff for the best tip I have ever gotten on ribs.
Jeff,
Last week i made the Smoked Pulled Chicken recipem you posted. The chicken came out very moist and tender. I decided to servce them on Hawiann King sandwhich rolls. These rolls havea slight sweet taste and compliment the the tase of the meat. Adding the coleslaw on top finish's off this perfect recipe. There was even enought for left over's ! My wife makes an awesome Blue Chees cole slaw that I will try on these nexttime. Thanks for all your great information. I look forward to your next posting with a hearty appetite!
M. Lawson
Omaha, Nebraska
Quesion: Not sure what I didn't do right. On an offset smoker, I smoked two 3.5# pork butts and 3 racks of baby back ribs. I followed your pulled pork recipie and injected with cherry dr. pepper. Those came out absolutely perfect. My problem was with the ribs. I've smoked ribs before and have had good results.( But I've usually done them without additional meats). I followed your 2-2-1 baby back rib article. After 2 hours of smoke they didn't even appear close to what I remember they should. So I left them on for another hour before placing in a pan of apple juice. They seemed like they softened up a bit and the rib edges were showing after 2 hours or so. Then I placed them back on the grill for the last hour. They were fully cooked with a nice smoke ring but not fall apart tender like I've done before. The only differences between this time and the others were: I've used spare ribs and a water pan in an upright smoker the other times. Could a water pan make that much difference? Could they have just been tough ribs? Any other suggestions?
Jeff, my aunt sent me a link to your site and I have been reading about your techniques on smoking ribs, today I tried your instructions, my ribs turned out the best I have ever eaten. I sorta used your 3-2-1 method, I cooked the ribs on my Primo ceramic cooker or smoker for 3 hours as you stated, then I put my rib racks in aluminum pans and poured apple juice about 1/4 inch deep as your recipe calls for then I cooked the ribs with the foil covering the rib racks and pan for another 2 hours, I didn't get to finish them up for the 1 hour, they were done and they were the tenderest ribs that I have done so far, the taste was supurbe but I used my recipe for the rub. I invited my buddies over and we ate ribs and had a few cold ones to wash them down, we didn't need any sauce because they were so tasty, I did sample the apple juice that was left in the bottom of the foil pans as a dip and it was fantastic also. The only thing I would do different the next time would be to cut back on the initial smoke time a bit and also cut back on the time with the apple juice, the ribs were so tender that the meat fell off the bone, I like to chew my ribs off the bone. Thanks a bunch for the cooking tips on your site, the directions were easy to follow and brought great results.
Gary Dixon,
Kimball, Tn.
As usual, Jeff, a nice article.
I do the St. Louis cut because it makes the ribs look nicer for competiton, however I leave the membrane on. It helps hold in the juices and makes the ribs more tender and once the ribs are finished cooking you can't tell the membrane was left on. I also save the flaps and add them to chili.