Smoked Porchetta
Smoking-Meat.com is supported by its readers. We may earn an affiliate commission at no extra cost to you if you buy through a link on this page.
Read this article without ads
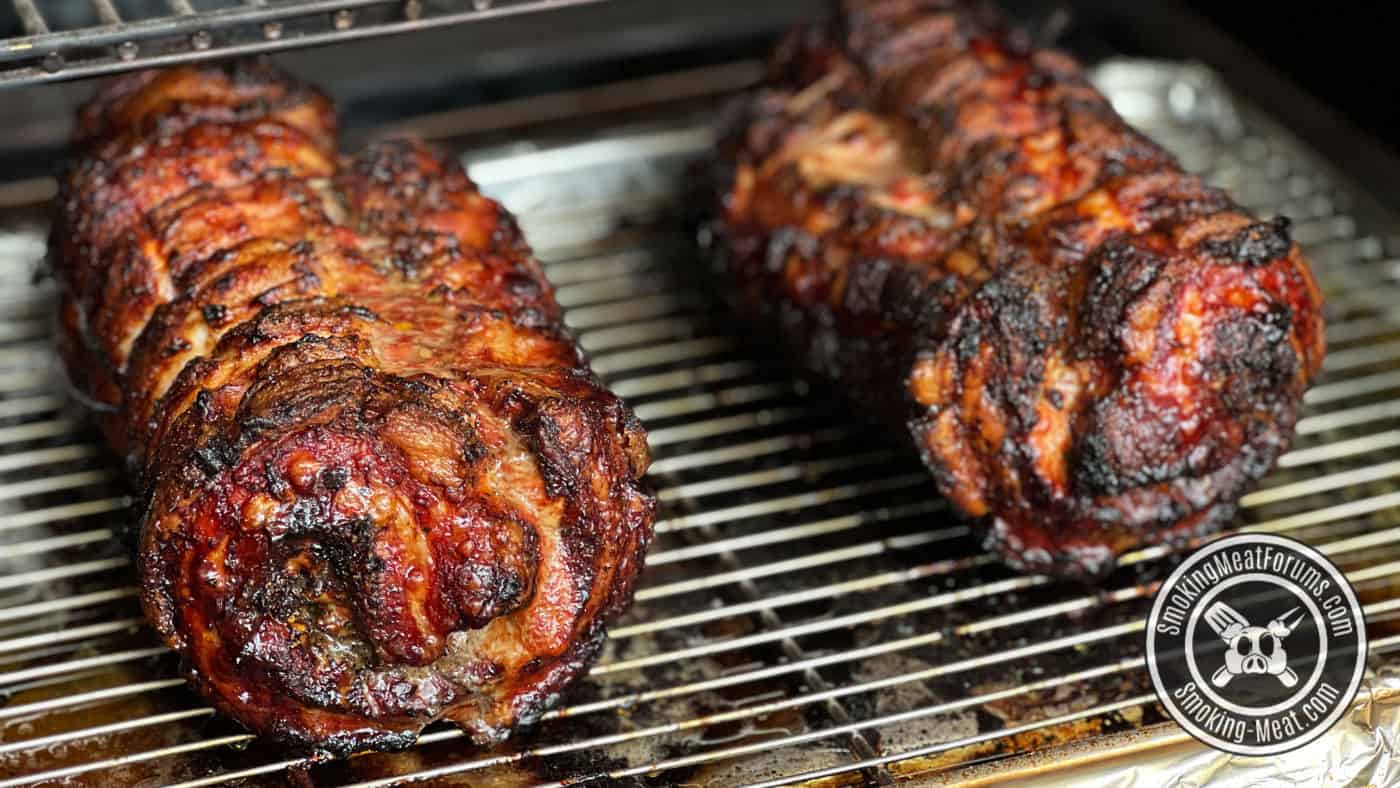
Smoked porchetta (pronounced por-ke'-ta), is an Italian recipe that rolls up a huge piece of pork heavily stuffed with seasoning, herbs, etc., and traditionally includes lots of fennel.
My smoked porchetta recipe is traditional in flavor, but uses the pork belly, the most mouthwatering melt-in-your-mouth cut of pork known to man, and boy is it good!
Let's get after it!
Helpful Information
- Prep Time: 30 minutes
- Dry Brine Time: 12 hours
- Cook Time: ~3 hours
- Smoker Temp: Varies (see instructions below)
- Meat Finish Temp: 200°F (93°C)
- Recommended Wood: Maple, hickory, cherry mix
What You'll Need (see recipe card below for amounts)
- Pork belly (skinless)
- Kosher salt
- Rosemary, fresh
- Thyme, fresh
- Fennel seed
- Olive oil
- Garlic, minced
- Black pepper, coarse ground
- Red pepper flakes
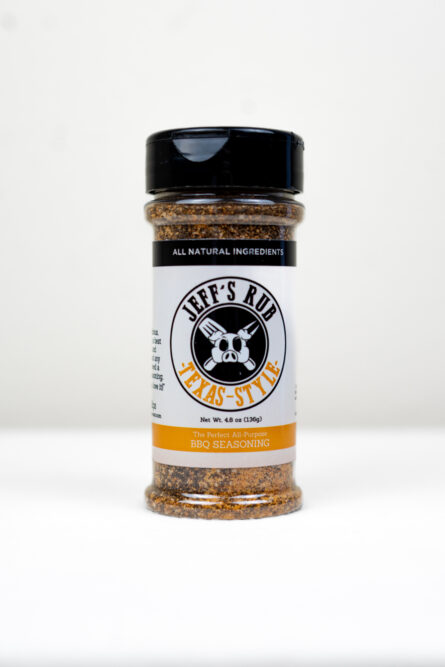
- Jeff's Texas style rub (Purchase formulas | Purchase bottled product)
- Jeff's original rub (Purchase formulas | Purchase bottled product)
- Butcher's twine (clean cotton string will work)
Let's Talk a Little More about Smoked Porchetta
Back in the day a smoked porchetta was huge, often an entire pig, but for a home cook, that's a lot, plus, I'm not big on the “whole pig” thing since every part of the pig has different cooking requirements.
In my opinion, the best flavor, texture and tenderness comes from cooking individual parts of the pig to their perfect tenderness using the perfect cooking method for each.
My smoked porchetta is a little different in that I simply use a rolled up pork belly, skin removed.
Most smoked porchetta recipes wrap a pork belly around a pork tenderloin or even part of the loin.
Once again, the leaner tenderloin is done at an internal temperature of 145°F (63°C) while the pork belly is best when cooked all the way to 200°F (93°C) to allow a lot of that fat to render and the meat just melts in your mouth.
Cooking the tenderloin and the belly together means the tenderloin is overcooked and/or the belly is undercooked. Not a good scenario in my humble opinion.
There's a lot of ways to do things and while I'm not saying my way is the only way, this is the way that turns out the best smoked porchetta at my house.
Here's How to Make My Smoked Porchetta
Step 1: Crosshatch and Salt the Fat Side
Lay the pork belly fat side up.
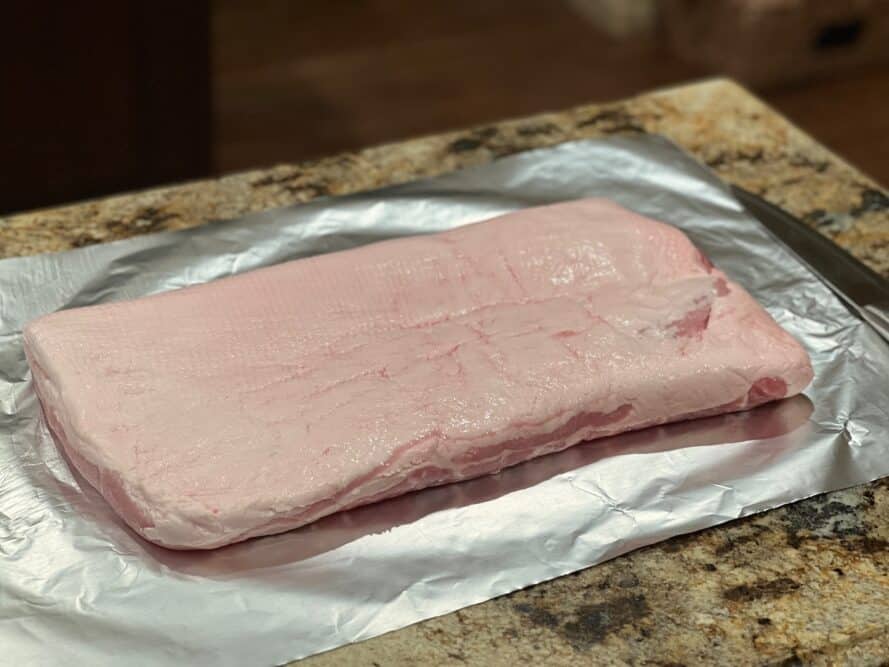
Use a sharp knife to cut ¼ inch deep crosshatch marks about ¾ inches wide from top to bottom and side to side.
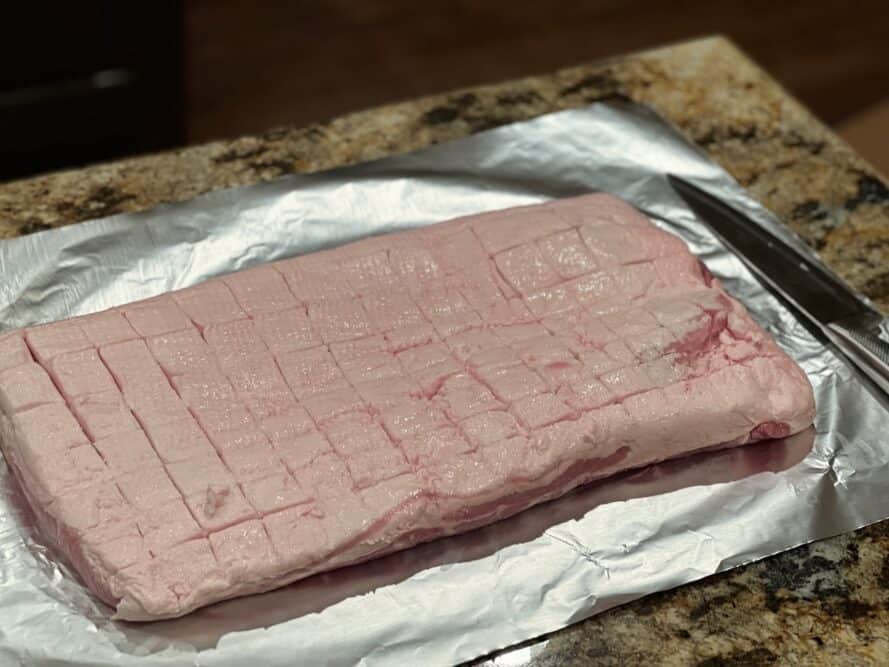
This will help the fat to crisp up a little and give the seasoning and salt a place to grab on to.
Apply a light coat of coarse kosher salt to the crosshatched fat cap. This will help to pull moisture from the fat during the time in the fridge.
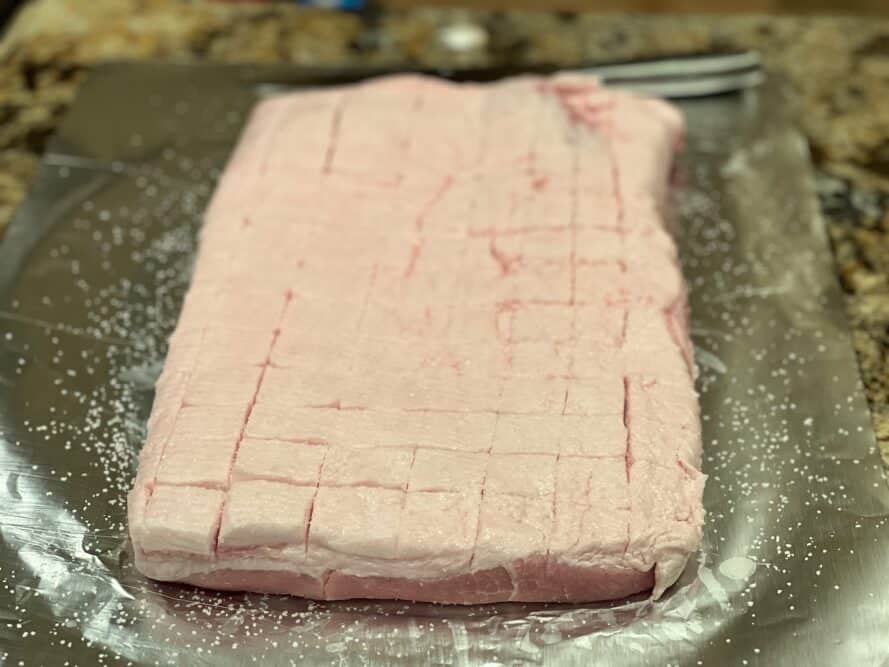
I only used about a TBS of coarse kosher salt to the fat cap and some of this will fall off or get wiped off during the process. For this reason, I consider it to be negligible and not part of the salt I use for dry brining the meat side.
Step 2: Crosshatch, Cut and Salt the Meat Side
Flip the pork belly over to meat side up and do the same crosshatch pattern in the meat about ¼ inch deep and about ¾ inch wide.
I went ahead and cut mine in half to make it more manageable. You can do this at any point in the process or not at all if you'd rather have a smoked porchetta that is full width.
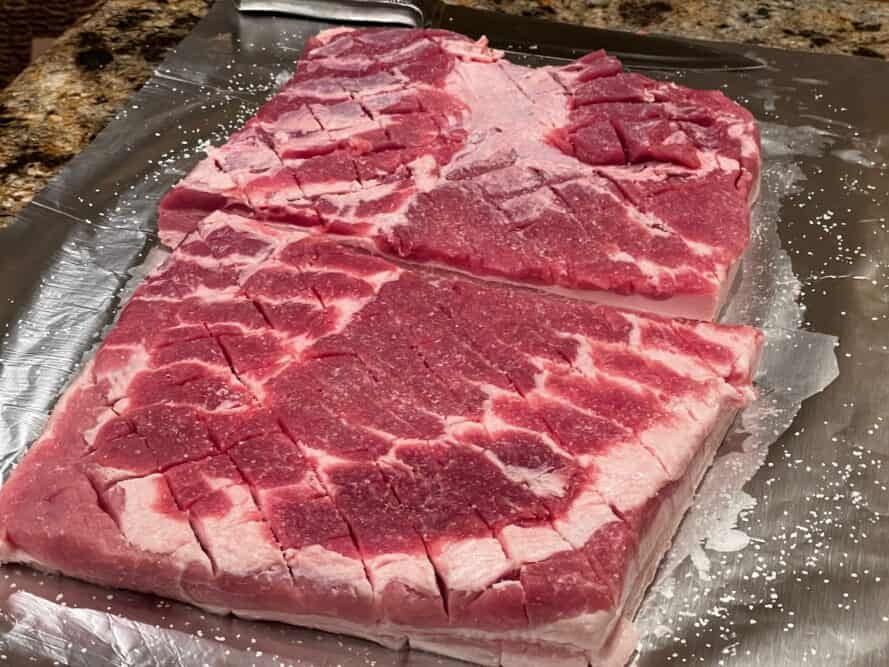
On the meat side, the salt is used for dry brining and almost all of the salt that is applied, will stay put.
In dry brining we typically use ½ teaspoon per pound of meat. I tend to use a little more than this in my own cooking.
My pork belly was 9 lbs and at ½ teaspoons of coarse kosher salt per pound, I need at least 4 and ½ teaspoons or 1-½ TBS.
I rounded up and sprinkled a nice even layer of 2 TBS coarse kosher salt on the meat side of the pork belly.
I also sprinkled on a liberal amount of Jeff's Texas style rub (Purchase formulas | Purchase bottled product) for good measure.
The belly is now ready for the herb paste.
Step 3: Make the Herb Paste
I removed the leaves from the rosemary and the thicker pieces of thyme and place equal amounts of that into a cheap coffee grinder (works great as an herb grinder.
Note: If the thyme stems are really tender, you can use the stems and leaves together.
I coarse ground up enough rosemary and thyme to make ¼ cup of ground mixture.
I then ground 2 TBS of fennel seed (ended up being about 1 TBS once ground)
Once the herbs and fennel were ground, I placed all of that into a bowl and added enough olive oil to make a spreadable paste. (about ¼ cup of olive eyeballed)
To this mixture, I added 1 TBS of red pepper flakes, 1 TBS of minced garlic and 1 TBS of coarse black pepper.
Mix this all together and if you need more oil to make it spreadable, that's no problem.
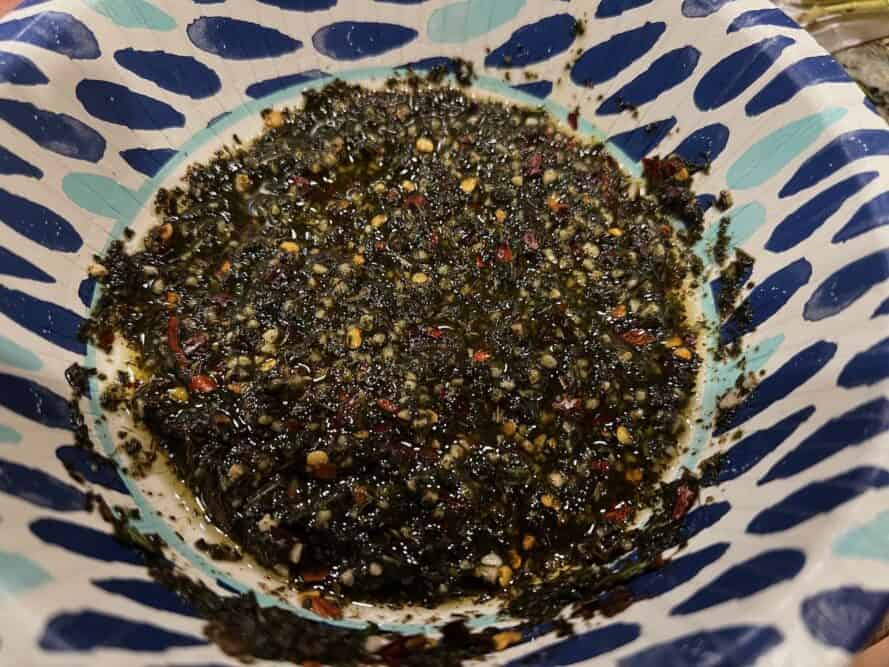
Place half of the herb mixture on each piece of pork belly and spread it out with your hands making sure to get it down in the cuts in the meat.
Man that smells amazing! THIS is a big part of what makes a smoked porchetta so freaking good and that fennel just takes it over the top!
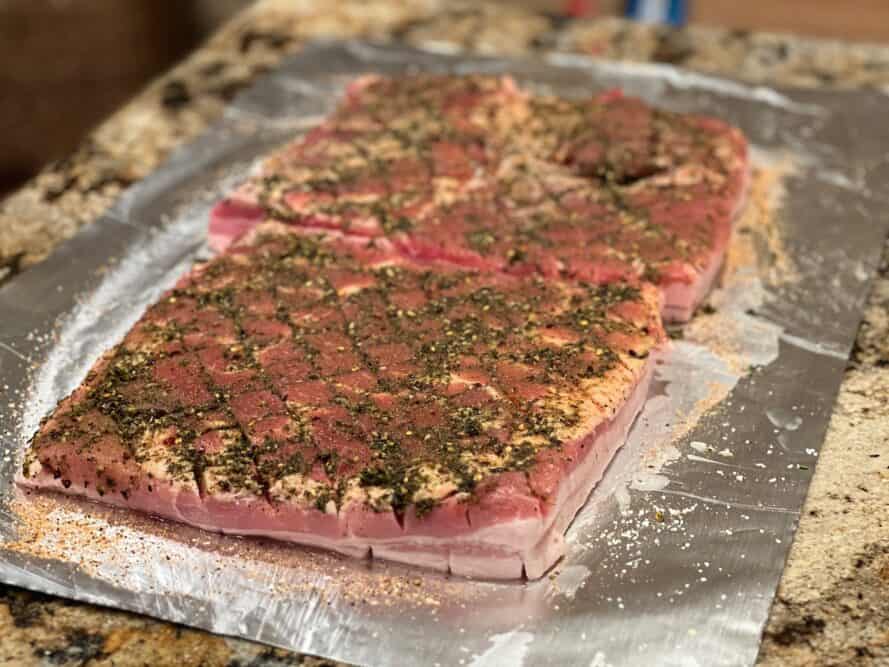
Step 4: Roll and Tie + Season the Outside
For this part, I recommend a helper if possible.
Roll one half of the pork belly up as tight as you can and tie it with butchers twine about every 1.5 to 2 inches to hold it really tight.
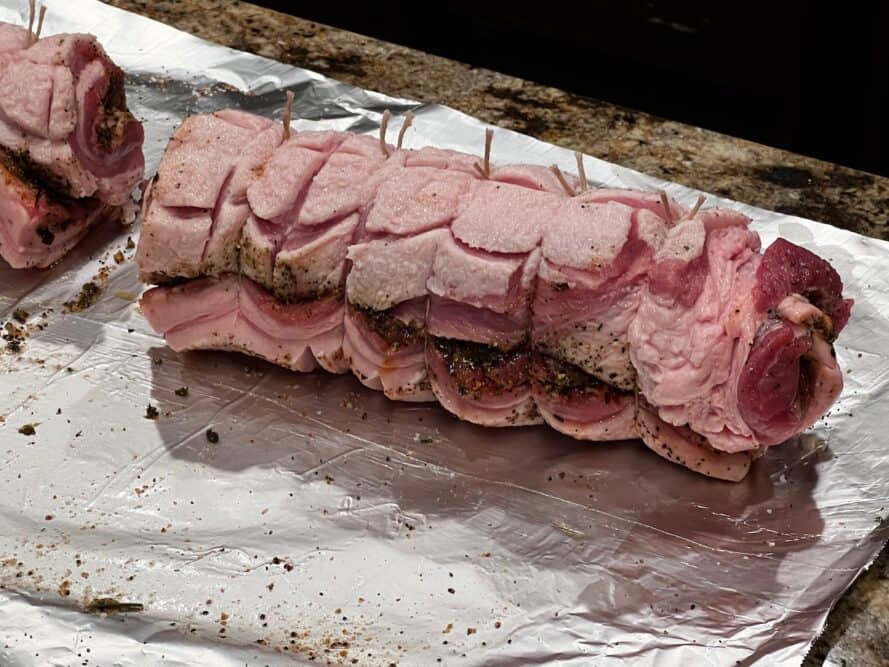
Roll the other half and tie it up just like you did the first one.
Stand there for a minute and take in the beauty of what you just did. Go ahead and lean over and take another whiff of that wonderful aroma if you want to.. you did good!
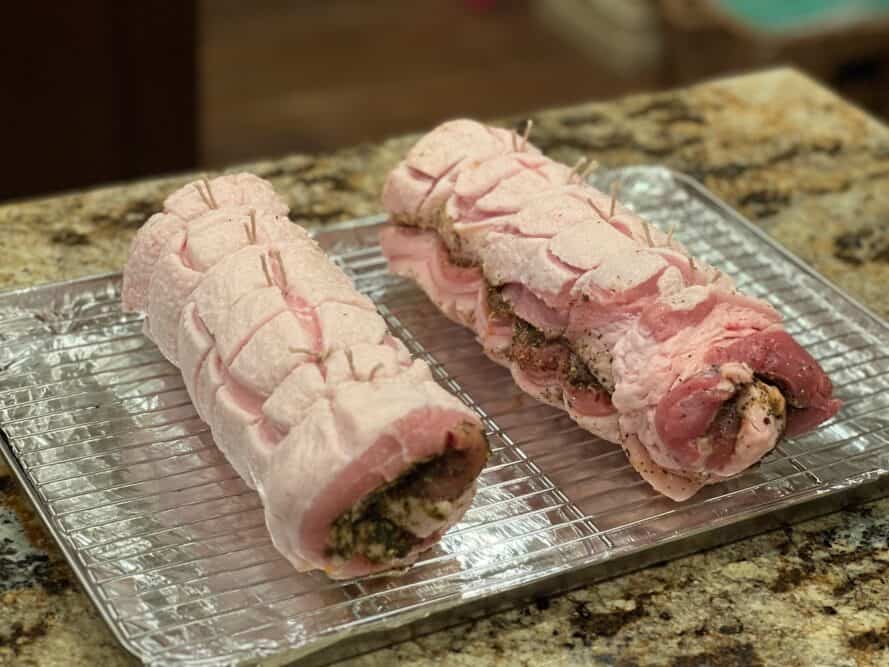
I decided at the last minute to add a good sprinkling of my original rub (Purchase formulas | Purchase bottled product) on the outside. It works so well on pork!
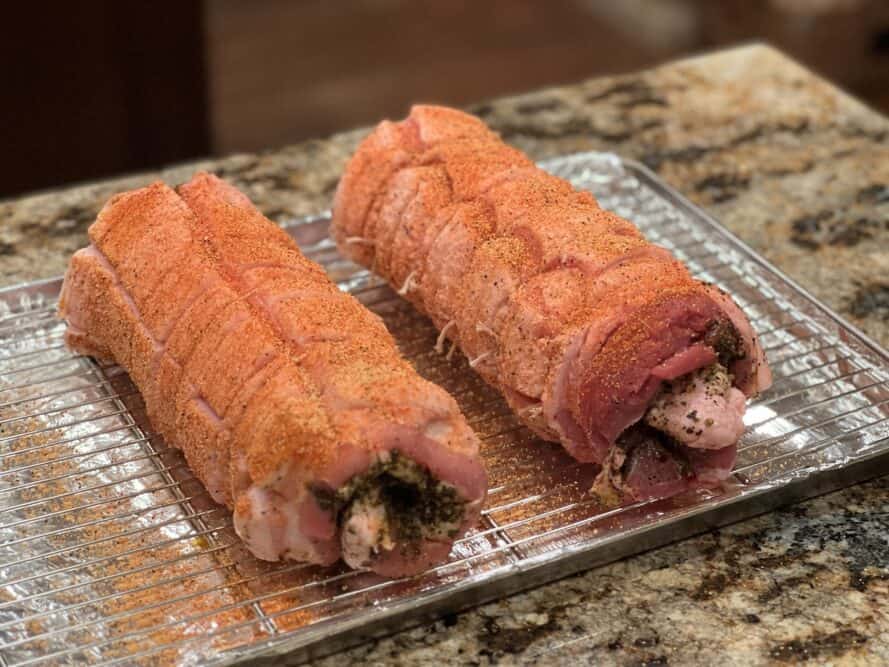
Step 5: Fridge Time
Place the rolls of tied up pork belly, soon to be smoked porchetta, on a pan with a rack and place the pan into the fridge overnight.
I recommend a full 12 hours if possible. It's even okay to leave them in the fridge for 24 hours if you want to and have the time.
Step 6: Smoker Time
The next morning, grab the pan of meat from the fridge and place it on the counter while you go get the smoker ready.
Traditional charcoal, wood, gas or electric smoker
Setup your smoker for cooking at 275°F (135°C) using indirect heat. If your smoker uses a water pan, fill up.
Once your smoker is up to temperature, it's time to cook!
Place the pan of rolled up pork bellies into the smoker and close the door/lid quickly to maintain heat.
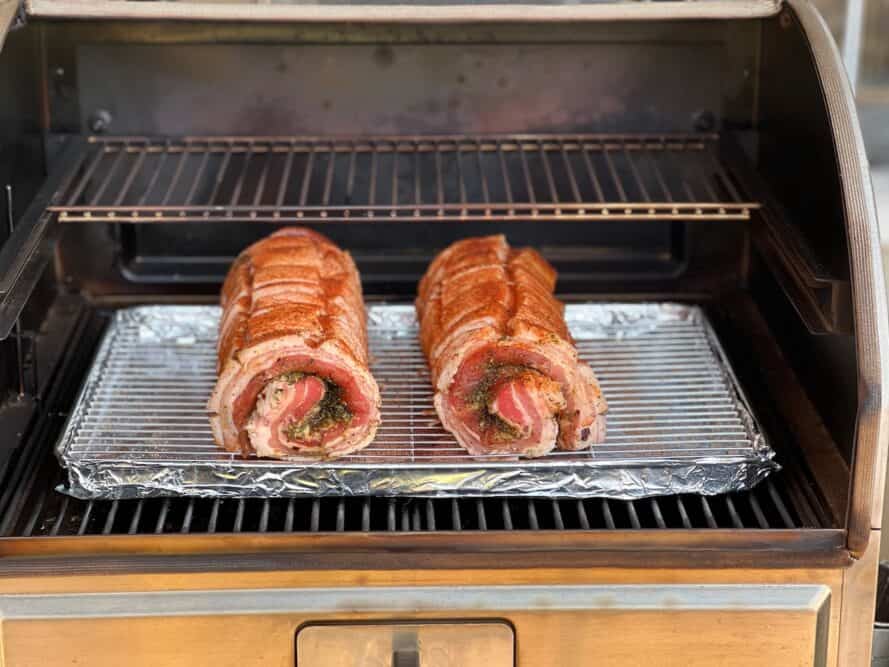
Keep a light smoke flowing for the entire time if possible.
Once the pork belly hits 180°F (82°C) or about 2.5 to 3 hours depending on the smoker, weather, etc., it's time to crisp the fat a little in a higher heat setting.
Note: If you're looking for a digital meat thermometer, my guide called “6 best digital meat thermometers” will help you decide which one is best for you.
If your smoker/grill can run at a temperature of 450+ or offers a direct heat setup then that'll work otherwise, it's best to use a grill or even the oven to finish it up.
Direct charcoal heat such as a kettle, Hasty Bake, Big Green Egg with the plate setter removed, etc. would be perfect for this.
A gas grill will also work okay.
Broil setting on your oven will also work great.
If you're broiling in the oven, keep a pan under the meat to contain the mess because a lot of fat will render.
Watch the pork bellies while you are crisping the fat so they don't burn. The idea is to get them on up to 200°F (93°C) internal temperature while also browning and crisping the fat.
Once it's up to temperature and as brown or blackened as you like, move it to the countertop.
Pellet Smoker
Setup your smoker for cooking at the lowest temperature possible or in the special smoke setting. I used the Camp Chef Woodwind Pro and set it to Lo Smoke.
Once your smoker is up to temperature, it's time to cook!
Place the pan of rolled up pork bellies into the smoker and close the door/lid quickly to maintain heat.
Hold this Lo Smoke setting for about an hour then crank up the smoker to 300°F (149°C) to finish. The slightly higher heat will offset the time you lost using low heat at the beginning.
Once the pork belly hits 180°F (82°C) or about 2.5 to 3 hours depending on the smoker, weather, etc., it's time to crisp the fat a little.
I cranked up the temperature on my Campchef Woodwind Pro to 450°F and it only took about 20 minutes to get a good brown on the top side. I rolled the smoked porchetta over to the other side to get some brown on the bottom side.
Another 15 minutes or so and it was perfect.
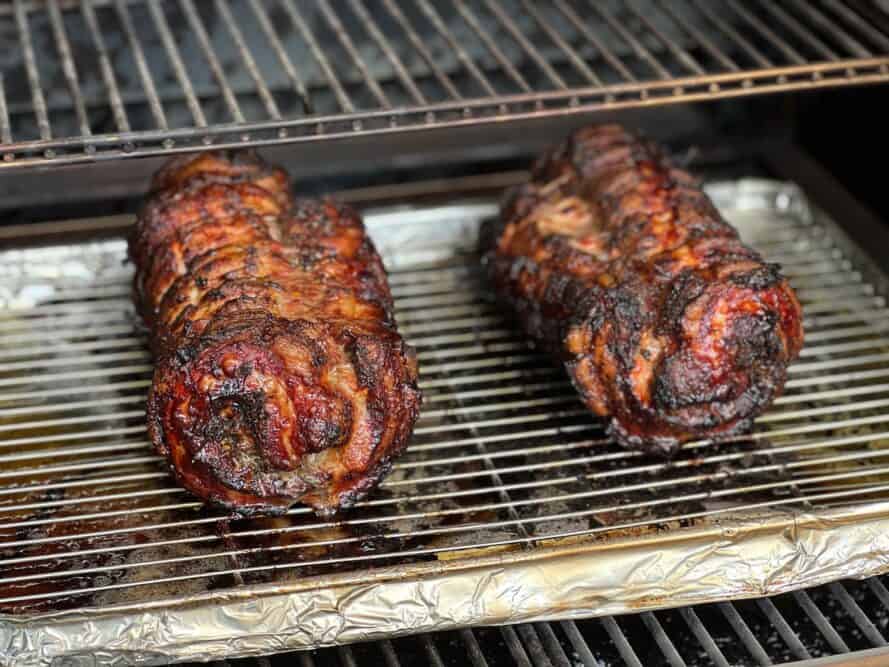
Once done, remove the smoked porchetta rolls into the house and leave them on the countertop.
Step 7: Rest and Slice
Drape a little foil over the top of the smoked porchetta to let them rest for 10-15 minutes before slicing into them.
Slice about ½ inch thick- pause to take a few bites- allow yourself the freedom to say wow and OMG a few times at the amazing flavor and then call the family to help you eat it.
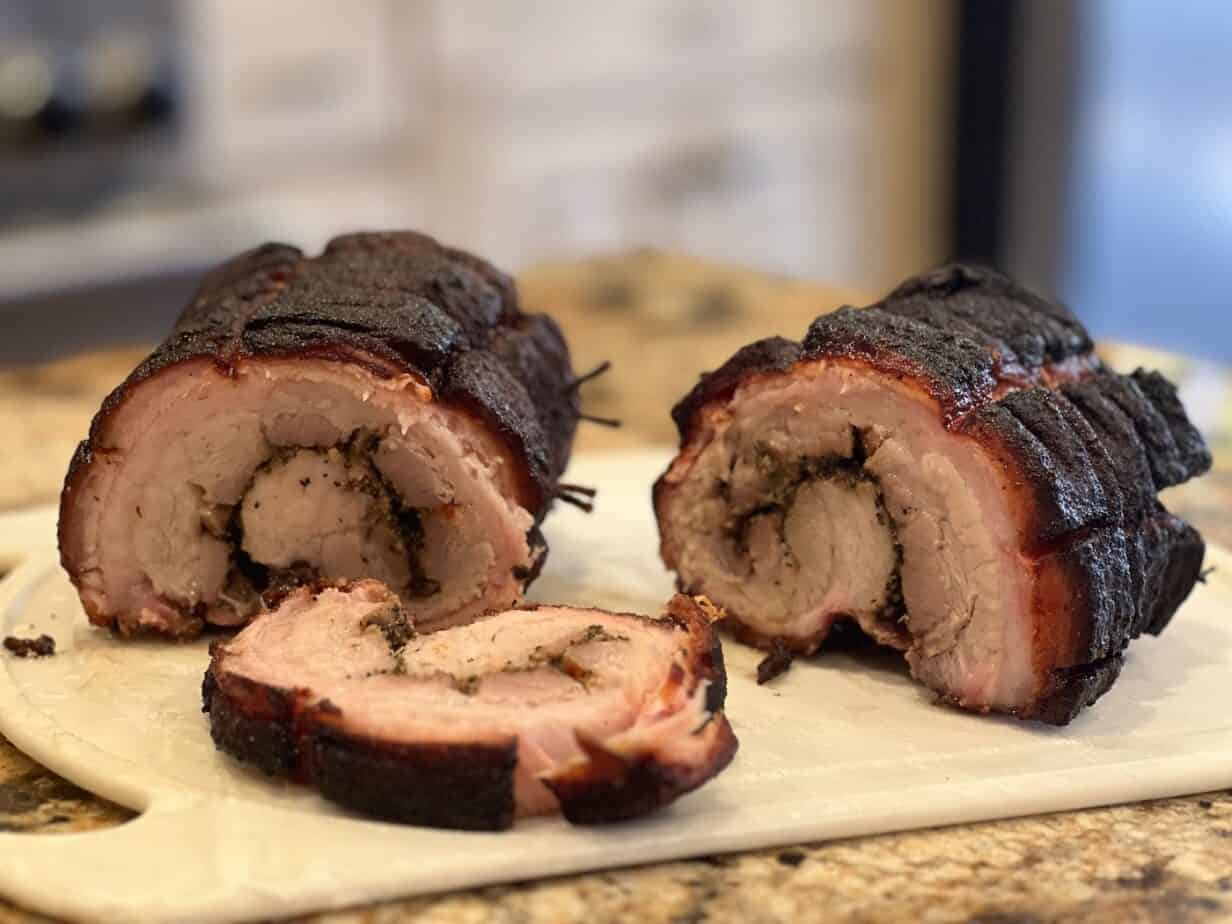
Don't forget to remove the strings!
We ate the first one gathered around the kitchen island.🤣
Smoked Porchetta
Ingredients
- 1 whole pork belly (skinless)
- 3 TBS kosher salt
- 2 TBS rosemary (fresh ground)
- 2 TBS thyme (fresh ground)
- 2 TBS fennel seed
- ¼ cup olive oil
- 1 TBS garlic (minced)
- 1 TBS black pepper (coarse ground)
- 1 TBS red pepper flakes
- 2 TBS Jeff's Texas style rub
- 2 TBS Jeff's original rub
- Butcher’s twine (clean cotton string will work)
Instructions
- Place the pork belly fat side up and cut a crosshatch pattern in the fatcap ¾ inch wide and ¼ inch deep.
- Apply about 1 TBS of salt evenly over the entire fat cap.
- Flip the meat over and cut a crosshatch pattern in the meat ¾ inch wide and ¼ inch deep.
- Apply about 2 TBS of coarse kosher salt evenly over the entire meat side. Also, sprinkle about 2 TBS of Jeff's Texas style rub evenly over the entire meat side.
- Make a paste from 2 TBS ground rosemary, 2 TBS ground thyme, 1 TBS ground fennel, 1 TBS coarse black pepper, 1 TBS minced garlic, 1 TBS red pepper flakes and ¼ cup olive oil. Mix until well combined.
- Spread the paste over the entire meat side of the pork belly then cut the pork belly in half.
- Roll each pork belly half tightly then tie every 2 inches with butcher's twine to hold it secure.
- Give the outside of the porchettas a good sprinkling of Jeff's original rub then place them in the fridge overnight.
- The next day, remove the meat from the fridge and leave it on the counter while you go get the smoker ready.
- Set up your smoker for cooking at 275°F (135°C) using indirect heat. If your smoker uses a water pan, fill it up.
- Once the smoker is ready, place the rolled pork bellies on the smoker grate and let them smoke cook at 275°F (135°C) for about 2.5 to 3 hours or until the internal temperature reaches 180°F (82°C).
- At that point, you can crank up the heat to 450°F+ in a pellet smoker or you can use a charcoal grill or even the broiler on your oven to crisp the fat and bring the porchettas on up to 200°F (93°C) internal temperature.
- Let the meat rest under tented foil for about 10-15 minutes on the counter, then slice about ½ inch thick and enjoy!


Jeff – there are a couple of unclear parts of the recipe and a few suggestions we’d like to make.
First it would be helpful to have the number of pounds of the pork belly you used as a reference since a much smaller (or larger) pork belly will be impacted by having too little or too much seasoning given the weight.
Also in step 5 it states: “Make a paste from 2 TBS ground rosemary, 2 TBS ground thyme, 1 TBS ground fennel…” yet the ingredient list states 2 TBS fennel seed. So which did you mean 1 TBS or 2 TBS? Hopefully 2 TBS as that seemed like the right amount.
2 TBS dried ground rosemary seems like an overwhelming amount as ground spices are much stronger than leaves so we used fresh rosemary and 2 TBS fresh finely minced rosemary leaves looked perfect. That much dried ground rosemary could be really bitter.
We also used fresh garlic instead of dried as the recipe does not state which to use. We used 2 TBS fresh minced garlic since it is not as strong as dried minced. Fingers crossed it will work!
Also thyme is not a standard porchetta seasoning so we only used 1 1/2 tsps dried thyme leaves instead of 2 TBS ground dried thyme which sounds like way too much as well however we wanted to include some to see if it helped the standard seasoning.
Thanks for all of your posts. We enjoy them!
Hi Jeff,
I am one of those people who does not like fennel at all. Obviously, one can omit if they don’t like. Do you think sage or marjoram, or perhaps some other herb could be used in its place. I think sage would probably be okay, since there’s a lot of crossover between white meat poultry and pork as far as seasonings/flavor additives. Just looking for an opinion other than my own. Thanks.
Aaron
I think sage would work just fine as long as you like that flavor. I tend to use sage very sparingly though as it can be overpowering in my opinion.
Ok Youve hooked me on this one a tasty treat Im sure as soon as this surprise spring snow storm ( 22 inches ) disappears Im trying it thanks
Hey Jeff, do you have to dry brine? If so, do you put the herb paste in and roll, then dry brine from there in the fridge?
You do not have to dry brine but it adds a lot of flavor, so I recommend it if possible.
Lay down the salt on the fat side first then flip it over to meat side. Salt goes down (if you opt to dry brine) then the herb paste and roll. Into the fridge overnight and cook the next day.
The dry brine happens while it’s rolled up in the fridge.
Wow. I prepared this for a large party (about 50 people) yesterday and it was freaking amazing and EVERYONE raved. Because it was a big crowd, I did two whole bellies (four rolls). I also did 54 pieces of chicken (legs & thighs) on my pellet grill. I followed Jeff’s recipe almost exactly except used Butt Rub for the outside sprinkling. They were all seasoned and left to get happy in the fridge for almost 24 hours. Belly Rolls were smoked at 275 for 3 hours in my BGE using peach wood from a tree we cut down in our yard a couple years ago. I timed it so that I got the chicken done in time to move the rolls to the pellet grill set to 450 degrees. The outside crisped up nicely. I never got it all the way up to 200 internal…it was about 180 when I took them off. The fat was well rendered, so the ratio of meat to fat was perfect and the meat was fork tender. The flavor was AMAZING and this will become something I will now make at least a couple times a year.
Your recipe calls for 2 TBSP of Jeff’s original rub, but it is not included in any of the directions. In Step 4 you apply the Jeff’s Texas style rub over the meat, but no mention of the original rub. Thanks.
At the end of step 4 in the main page instructions, I added a good sprinkling of the original rub on the outside of the porchetta. Somehow this was omitted from the recipe card. I have added this in at step 8 and I appreciate you letting me know about this.
The flavor when I cooked it was terrific. But I have a question. The new DA minimum temperature for cooked pork is 165. Why do you take it to 180 and even 200? Won’t that dry it out?
I cooked mine to 165, then cut slilces that I sauteed to reduce the fat. It was yummy. I was concerned about what would happen at the high internal temperature.
Dave, Unless they’ve changed something in the last month or two, since 2011 they have reported that pork is now safe as low as 145°F (63°C)
That is only the case for pork that has not been ground. Ground pork should be cooked to 165°F (74°C).
To answer your question, cuts that have a lot of fat and connective tissue are safe to eat at lower temperature but they are usually not as tender as they can be. Cuts like pork shoulder and pork belly are cooked to much higher temperatures to allow them time to break all of that fat and connective tissue down so it can be tender.
Pork belly keeps getting more and more tender the longer you cook it up to a point. I have found that around 200°F (93°C) is the sweet spot. A lot of that internal fat doesn’t even start to render until it reaches 180°F (82°C) so it’s at it’s best beyond that point.
Try it sometime and you’ll see that it does not dry out but rather continues to get better.
“ I cooked mine to 165, then cut slices that I sauteed to reduce the fat.”
You kinda answered your own question there. By continuing to cook it to 200 the fat you had to sautee to render will instead render on its own, inside the rolled up belly retaining that flavour as much as possible and increasing the tenderness of the dish. “Low and slow” is the way for this one, versus “hot and fast”
Jeff,
Why did you choose to remove the Skin when most recipes leave the skin on?
I’m just not a big fan of tough pig skin on this dish.. pig skin is really good when deep fried and made crispy but, in my opinion, porchetta tastes better with just the fat than it does with the tough skin + the fat.
I know this is not what most recipes show but I sometimes think that people just follow recipes without really thinking about their own likes and dislikes and the fact that it’s okay to change things up.
Most people also wrap the pork belly around a pork tenderloin and that just makes no sense to me at all.. the tenderloin is super lean and will end up way overcooked by the time the pork belly gets perfect. If you want to wrap the pork belly around something, cut off a piece of the belly and wrap the rest of the belly around that.
There’s certainly nothing wrong with leaving the skin on if you want to do that. If you do, be sure to give it plenty of direct high heat at the end so it can crisp up. You will also likely need to allow for more time.
Hey Jeff, this looks amazing! Have you ever tried putting something in the middle of the rolled up pork belly? My initial thought was cheese but I am guessing that would leak through. Maybe vegetables or stuffing? Just curious what you think
Dan, I haven’t tried anything other than the typical herb mixture in the center. Anything that melts would leak out really bad but maybe a sausage mixture, chorizo, pulled pork, there’s a lot of things that would be amazing stuffed in there.
Hey Jeff I was wondering why I can no longer save your recipes
On my Pinterest.
I was able to save all your recipes and now you don’t give me that option anymore. Please let me know when I can do this thank you very much.
Tom Aguilar
Of all your recipes this was the hardest to read. I have never seen so many Ads. Guess I will wait for a better version.
Sonny,
Unfortunately, the ads are necessary to support the website. Having said that, if you scroll to the bottom there is a recipe card that is a summarized version of the recipe. It is also made to be printable.
do you hae instructions specifically for this recipe done in a Pit Barrel Cooker?
Jim, I don’t have instructions for this yet but I know the barrel would work wonderful for this.
I’m thinking you would want to lay it on the grate and maybe turn it every so often to get all sides some direct heat contact. The barrel typically runs at around 300°F (149°C) and it’s direct heat so you’re probably looking at 2 hours maybe less.
If anyone has done this, jump right in and offer some tips.
You could possibly use the turkey hanger through the center of the roll if you wanted to hang it up.
Just talking about it makes me want to go grab one and try it😋
Thanks Jeff. Still waiting for the real “smoking season” to get started here in Maine, but as soon as it does i’m going to give this a try. will be sure to let you know what I do and how it turns out.