Pork Rib Smoking Methods Compared: 3-2-1, 2-2-1, No-Wrap and More
Smoking-Meat.com is supported by its readers. We may earn an affiliate commission at no extra cost to you if you buy through a link on this page.
If you have been reading about smoking ribs, you have probably run across enough numbers to wonder whether you are learning to barbecue or trying to remember a combination lock. The good news is that 3-2-1 and 2-2-1 describe variations of the same basic idea, and choosing between them gets easier once you know what you want the ribs to be like.
$19/year
Less than $1.60 a month, billed annually.
Renews yearly until canceled.
Already a member? Log In
Some folks want ribs that practically fall apart when they pick them up, while others want a firmer bark and meat that stays on the bone until they take a bite. This page will help you choose an approach that fits your ribs, your schedule and your preferred texture, with links to the full recipes when you are ready to cook. For the entire process from buying a rack to serving it, start with my complete pork rib guide.
What the Numbers Mean
In a numbered rib method, the first number is the approximate time cooking unwrapped, the second is the time wrapped in foil, and the third is the time back out of the wrap to finish. A 3-2-1 cook therefore starts with roughly three hours exposed, two hours wrapped and one hour exposed again.
Those are hours, not a guarantee. Most of these familiar schedules are starting outlines for cooking around 225°F, and changing the temperature, rack thickness or desired tenderness changes how long each stage needs. Two hours in foil can be far too much for a thin rack, and the final hour is not mandatory if the ribs are already tender and the sauce is set.
Compare the Main Rib Methods
| Method | Best reason to choose it | Planning outline | Main tradeoff |
|---|---|---|---|
| 3-2-1 | Very tender spare or St. Louis ribs | About 6 hours at 225°F before adjustments | Long foil time can soften bark and overcook thinner racks |
| 2-2-1 | A shorter starting schedule for baby backs | About 5 hours at 225°F before adjustments | Two wrapped hours may still be too long |
| No-wrap | Firmer bark with fewer wrapping steps | At 240°F, roughly 4–6 hours for baby backs or 5–7 for spares | Exposed edges need attention and timing remains variable |
Use those times to plan, then judge the actual rack. If you are still deciding what to buy, my baby back, spare and St. Louis rib comparison explains the differences that matter before you choose a cooking schedule.
3-2-1: A Useful Starting Point for Very Tender Spare Ribs
The appeal of 3-2-1 is that it breaks a long cook into stages you can understand. The ribs get time exposed to smoke, the foil helps them soften, and the final exposed period lets you finish the surface and set a thin layer of sauce if you want one.
I would consider this first if you are cooking spare ribs or St. Louis ribs and want them very tender, but I would not promise that every rack needs two full hours wrapped. Check the meat during that stage and shorten it when necessary, especially if you want a little bite left.
My 3-2-1 method guide explains how to adjust the stages, while the 3-2-1 St. Louis spare rib recipe gives you a complete cook to follow.
2-2-1: A Baby Back Starting Schedule
The 2-2-1 outline shortens the first exposed stage to about two hours, then keeps the familiar two hours wrapped and one hour to finish. It is commonly associated with baby backs because many racks are smaller than spare ribs.
The important word there is many. An extra-meaty baby back rack with a thick layer of loin meat can behave differently from a smaller, thinner rack, and shortening only the first stage does not solve every timing problem. Watch the wrapped stage closely rather than assuming that baby backs automatically need two hours sealed in foil.
You will find the adjustments in the 3-2-1 guide’s discussion of 2-2-1. If you cook on a ceramic cooker, my existing 2-2-1 baby back ribs on the Big Green Egg is another example of the approach.
Adjust the Stages to Get the Tenderness You Like
You do not have to follow 3-2-1 exactly, and every adjustment does not need its own method name. Think of it as a framework you can change to get the tenderness and surface texture your family enjoys.
For example, if three hours exposed, two hours wrapped and one hour to finish makes the ribs softer than you like, try 3½ hours exposed, 1½ hours wrapped and one hour to finish. You have moved half an hour from the wrapped stage to the first exposed stage, while keeping the same six-hour planning window.
Less time sealed in foil generally gives you less of the softening that happens during that stage, while more time exposed gives the surface longer to develop. If you want softer ribs instead, you can shift some time toward the wrapped stage, checking along the way so you do not take them past the texture you want.
Keeping the same total makes the adjustment easy to understand, but six hours is not a requirement and moving time between stages does not guarantee the ribs will finish at the same moment. The stages cook differently, and rack thickness, smoker temperature and the amount of liquid in the wrap all matter. Shorten or extend the cook as the actual ribs need, and use the final exposed stage only as long as it helps.
Make one adjustment at a time and keep notes. That lets you learn what shortening the foil stage does, rather than changing the temperature, wrapping liquid and every stage length together and wondering which change made the difference.
No-Wrap: Let the Bark Stay Exposed
No-wrap ribs stay out of foil for the entire cook. That makes this a good choice when you enjoy a firmer, more developed bark and would rather skip the work of wrapping and unwrapping a hot rack.
There is still some tending involved. Keep the ribs over indirect heat, watch for a thin edge getting too dark and rotate the rack if your smoker has a hot area. Spritzing is optional rather than a requirement, and leaving the foil in the drawer does not mean leaving the ribs unchecked.
Choose my no-wrap rib guide for the complete process. If you want to understand what changes when you use foil, paper or neither, the rib wrapping comparison goes deeper into those choices.
What About Hot-and-Fast Ribs?
Hot-and-fast ribs use a higher cooking temperature to shorten the cook rather than following one universal numbered schedule. You may see approaches around 275°F to 300°F, with wrapping or without it, so the phrase describes a temperature strategy rather than one fixed recipe.
It can be useful when time is limited, but it needs a recipe written for that approach. Do not turn the smoker up and leave the original five- or six-hour schedule unchanged, especially with a sweet rub or sauce that can darken quickly. My rib time and temperature guide will help you understand how temperature changes the planning window.
How I Would Choose
If you want very soft spare ribs, start with the 3-2-1 approach and adjust the foil stage to the rack. For baby backs, use 2-2-1 as a reference and begin checking earlier. If you like some wrapping but want less softening, shift a little time from the wrapped stage to the first exposed stage. If your favorite part is the bark and you want fewer handling steps, choose no-wrap.
You do not have to collect every numbered variation to become good at ribs. Pick one approach, write down the rack size, smoker temperature and how the meat felt at the end, then change one thing on the next cook. A useful set of notes will do more for your ribs than memorizing another set of numbers.
My repeatable target for tender pork ribs is 195°F, measured in a thick area between the bones without touching bone, with probe feel and the bend of the supported rack helping confirm the texture. Use my rib doneness guide to learn those checks, and remember that a clock cannot tell you how tender a particular rack has become.
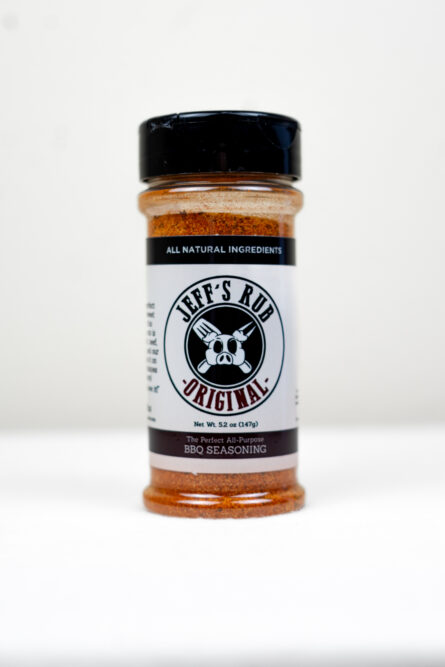
Whichever method you choose, season the ribs with the salt already in the meat in mind. My Original Rub is very low in salt because I developed the spice flavor first and added salt last to bring it out, which lets me apply it generously without making salt the main flavor. Other rubs can be much saltier, so adjust their amount rather than treating them all alike.
When you are ready to cook, browse my pork rib recipes and choose the flavor and method that sound good to you.
Don’t Lose This Article
Enter your email and I’ll send a link to this article straight to your inbox so you can read it anytime.
Join the Smoking Meat Community
Have a question about this technique or want help with your next cook?
Join the conversation with other backyard pitmasters.