Smoked Spare Ribs that Literally Fall Apart
Smoking-Meat.com is supported by its readers. We may earn an affiliate commission at no extra cost to you if you buy through a link on this page.
Read this article without ads
I receive emails every week asking how to make super tender spare ribs in the smoker and some even say that the 3-2-1 method still doesn't get them as tender as they like. This week I'm going to show you how to make spare ribs that are so fall apart tender that you can just pull the bones out as if they were in hot butter.
Not your thing? No need to email me saying that this is not how spare ribs are supposed to be cooked. If that's your paradigm, then you can ignore this recipe– no hard feelings =)
I made these spare ribs a while back and we deboned them (very easily I might add) and made one of the best rib sandwiches I've ever had (and that's saying something)!
The flavor is also unbelievable since we will apply my original rub on them the night before and give them things of beauty all night to soak up the good stuff. I could not get over the flavor as well as the tenderness on these and everyone at the table agreed that these were to die for.
- Prep Time: 20 minutes
- Cook Time: 10 Hours
- Smoker Temp: 225-240°F
- Meat Finish Temp: 195-200°F
- Recommended Wood: Pecan/Cherry mix
- 2-4 racks of St. Louis style spare ribs
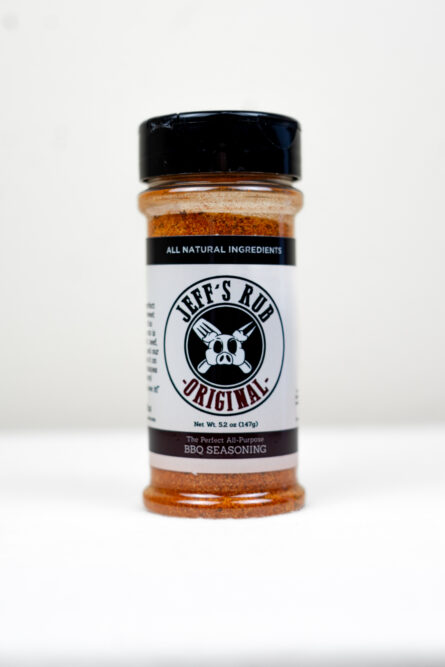
- Jeff's original rub
- Foil (Heavy Duty)
- Full size foil pan (approx. 12 x 20 works best)
Remove the spare ribs from the package and rinse under cold water.
I purchased my ribs already cut St. Louis style and for this reason, I wanted to make sure that there was no bone fragments. The rinsing takes care of this.
The ribs are then patted dry with a clean paper towel and set aside.
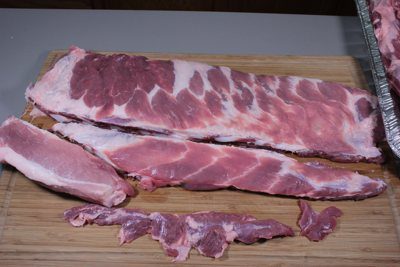
It occurred to me that some of you may not know what St. Louis style ribs are.. it's just a style of trimming the ribs to get rid of the less desirable parts of the spare ribs and make them into a better looking rack much resembling a rack of baby backs.
The picture below will show you a basic pattern for cutting the full size spare ribs into St. Louis stye:
With the ribs laying bone side up, you'll notice a shiny, plastic-like membrane covering the bones.
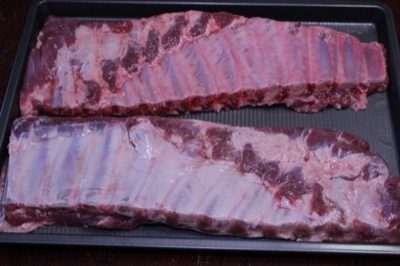
Work your finger, a spoon or some other implement under the membrane, work it loose and grasp it with a paper towel to pull it clean off.
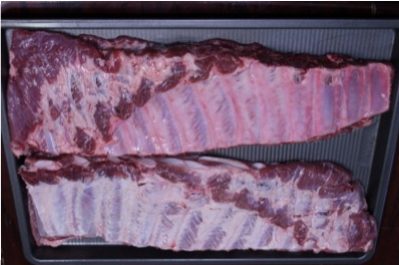
This takes practice but in no time you'll have it.
Don't fight with it.. if you have trouble with it, just get what you can and leave it at that. It's not the end of the world if it remains.
Bone Side
With the ribs still laying bone side up, coat the meaty part of the bone side with lots of the original rub. Be extremely generous as this will create the delicious crust that you'll rave about later.
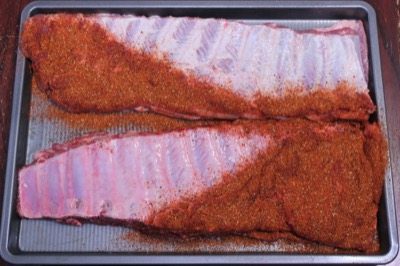
Give a light sprinkling over the bone area as well..
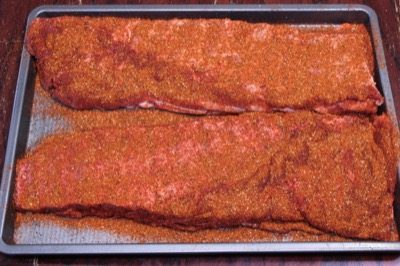
Leave them sitting in this configuration for about 10 minutes or until they get that “wet” look.
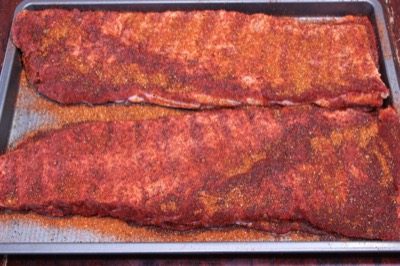
Turn the ribs over to meaty side up and generously sprinkle my original rub all over making sure to hit the sides and ends as well.
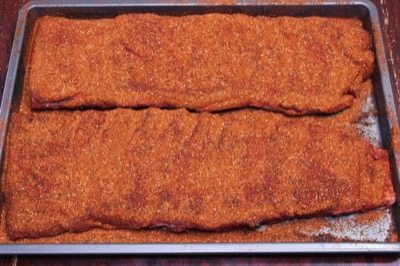
You can place them in the fridge at this point but after just an hour or so, you'll see how the rub draws the moisture to the top and creates a nice paste. The flavors merge and some of that is drawn back into the ribs. It's a beautiful thing!
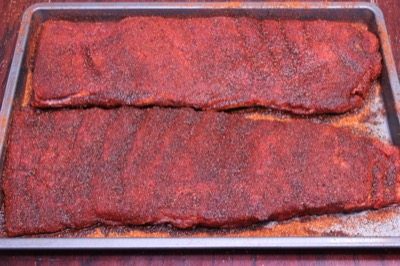
Setup your smoker for cooking at about 230°F using indirect heat. If your smoker has a water pan, fill it up with water.
You will need enough smoking wood to last about 4 hours– I recommend a mix of pecan and cherry but any smoking wood will work great.
Once the smoker is ready, place the ribs on the smoker grate bone side down with at least an inch between each one to allow the smoke and heat to have access to all sides of the meat.
The ribs will stay in this configuration for 4 hours.
During this time the rub will turn into a crust (a good thing), the heat will cook the meat and the smoke will flavor the meat.
Very carefully remove the ribs from the smoker and wrap the ribs individually with heavy duty foil. I did not get pictures of this process but I wish I had so I could show you how I wrap them.
I tear off as many pieces of 18-inch foil about 30-36 inches long as I have racks of ribs. I had 2 racks of ribs so I had 2 pieces of foil this size laid on top of each other.
The first rack was taken off and laid in the center of the top piece of foil.
Note: often during this wrapping stage we'll add a liquid of some kind but I don't recommend it on these since they will be in the foil for so long. We want them to tenderize but if there's too much moist steam, it can make the rub crust soft and in some cases even dissolve it and we want it to stay intact and crispy.
The bottom of the foil was brought up over the ribs then the top was folded down over that. Each side is then carefully folded over.
I say carefully because some time a bone will be sticking out and that can easily puncture the foil. The foil doesn't have to be airtight but it's best if it doesn't have holes that allow the steam and juices to escape.
The wrapped ribs are placed into a full sized steam pan (about 12 x 20). For what it's worth, I can fit about 4-5 racks of wrapped ribs in one of these.
The purpose of the pan is to catch leaks. The foiled ribs will most likely leak.. it's bound to happen and in my opinion, this is an easy way to contain it. Less cleanup is always a good thing!
If you have an electric smoker or one that is very easy to maintain a good set temperature, then the pan of wrapped ribs can just go right back into the smoker at the same temperature (230°F)
If it's easier, you can also just place the pan of wrapped ribs into your kitchen oven set to 230°F.
Keep them at this temperature for 2 hours.
At this point the ribs are done and somewhat tender but we want to super tenderize them, remember?
Turn the smoker or oven down to about 200°F since we don't want to cook them a lot more but just let them tenderize
This super tenderizing step will go on for about 2 hours.
I recommend checking the ribs at the end of this step using the Thermapen, one of my favorite handheld thermometers which has a very small tip and is able to get between the bones very easily.
Open one side of the foil very carefully and check one of the racks to see if it's where it needs to be.
The temperature should be around 195-200°F at this point.
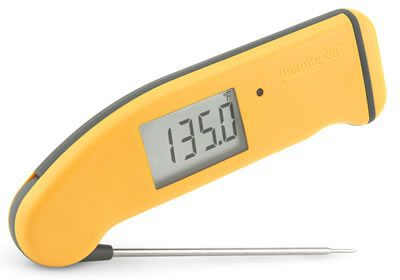
Now we just want to let the ribs rest at a really low heat during which time the meat will continue to tenderize, the fat will continue to render and the bones will loosen from the meat.
For the final step in the cooking/tenderizing process, turn the smoker or oven down another 30 degrees to 170°F.
This step only took about 1.5 hours but be ready to be flexible. At 1.5 hours open one of the packages, grab a bone and try to rotate it. If the ribs are ready you should be able to rotate the bone and even pull it cleanly from the meat with little to no resistance.
If you are able to rotate/remove the bones, then good, If there's resistance, wrap it back up and give them 30 more minutes.
Unwrap the ribs, flip the rack over to bone side up so you can get to the bones. If they break in half during this step (very likely) it's ok. They will be so tender that they will be falling apart.. that's what we wanted on these.
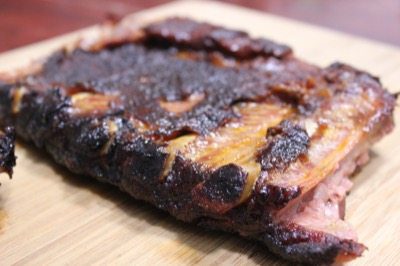
Grasp each bone and rotate to make sure it's loose then simply pull it out of the meat and discard.
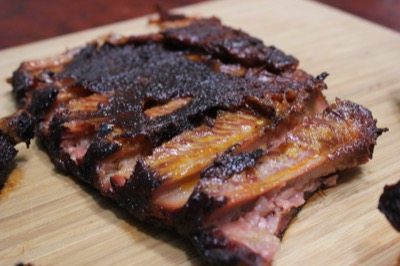
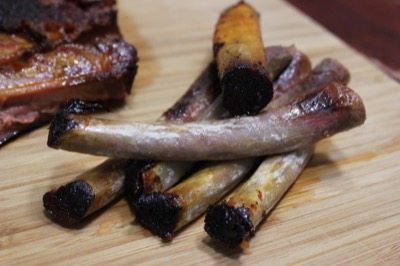
Once the bones are removed from the entire rack, cut the meat into pieces about 1 inch wide and they are ready to serve.
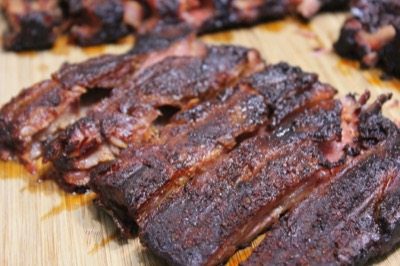
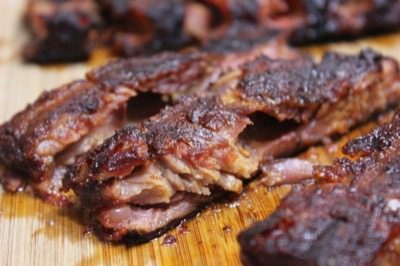
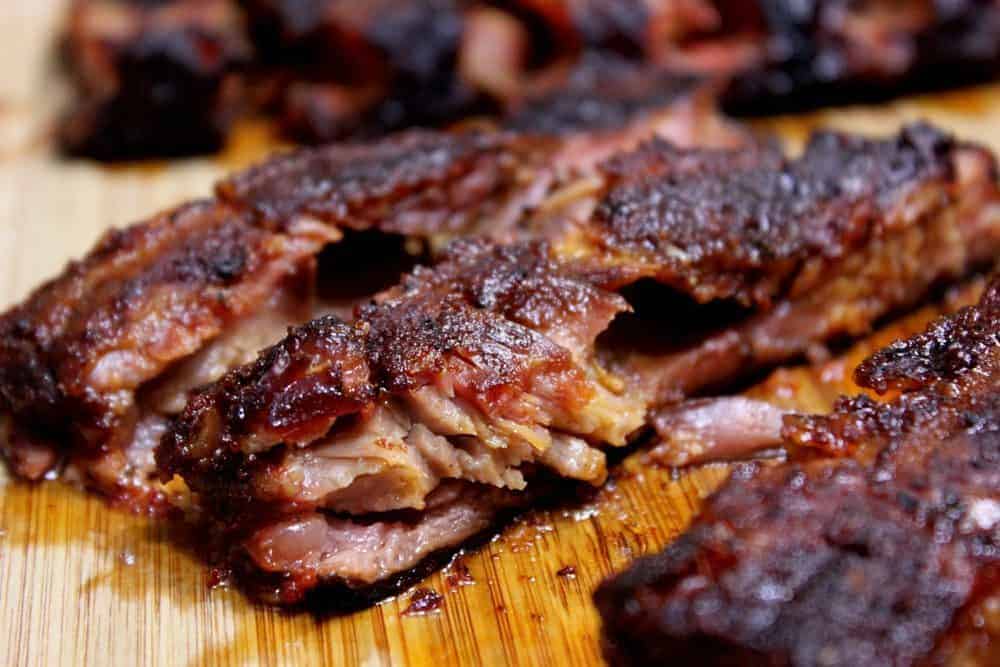
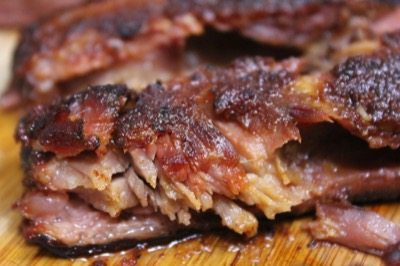
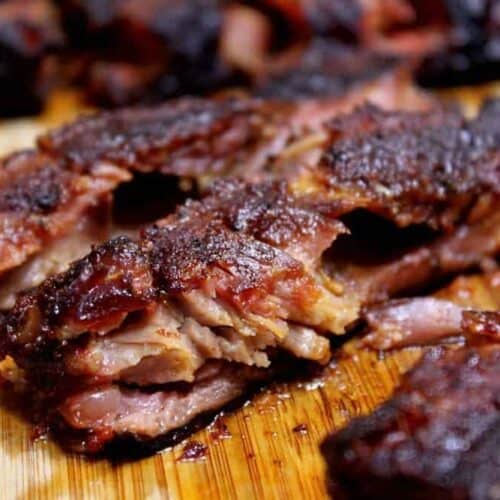
Here's a close up to show you just how tender and juicy these end up being:
Because there's so many steps, this one may seem complicated so let me break it down for you in 8 easy to follow steps:
- Rinse, pat dry, and remove membrane.
- Apply my original rub heavier than usual.
- Place in fridge on a cookie sheet overnight
- Setup smoker for cooking at 230°F
- 4 hrs @ 230°F – laid on grate with pecan/cherry smoke
- 2 hrs @ 230°F – wrapped (no smoke required)
- 2 hrs @ 200°F – wrapped (no smoke required)
- 1.5 hrs @ 170°F – wrapped (no smoke required)
Smoked Spare Ribs that Literally Fall Apart
Ingredients
- 2-4 racks of St. Louis style spare ribs
- Jeff's Original rub
- Foil (Heavy Duty)
- Full size foil pan (approx. 12 x 20 works best)
Instructions
- Remove ribs from package and rinse under cold water.
- Cut brisket bone and square ends to make them St. Louis style spare ribs.
- Remove membrane.
- Generously coat bone side of ribs with Jeff's original rub.
- Wait about 10 minutes for the rub to take on a “wet” look. This means the rub has mixed with the rib juices and will stick to the ribs without falling off when you turn them over.
- Flip the ribs over to meaty side up and coat the top and sides with generous amounts of Jeff's original rub.
- With the ribs on a cookie sheet, place them in the fridge overnight to allow the flavors in the rub to seep into the meat.
- Set up your smoker for cooking at about 230 °F with indirect heat. If your smoker has a water pan, fill it up with hot water.
Follow this cooking schedule:
- -4 hrs @ 230°F – laid on grate with pecan/cherry smoke
- -2 hrs @ 230°F – wrapped (no smoke required)
- -2hrs @ 200°F – wrapped (no smoke required)
- -1.5 hrs @ 170°F – wrapped (no smoke required)
- Remove the ribs from the foil and pull the bones out of the meat.
- Slice the meat into ribs that are about 1-inch wide.
- Serve right away.


Sorry if this a clueless question, but a foil pan sealed with foil = wrapped , right? I’ve found sealed foil pans much, MUCH easier to handle than wrapped foil. (It’s possible I’m a bit lazy.) THANKS!
Dave, Yes a sealed foil pan is what I use often and it works great to hold in the steam and braise the meat.
I made these ribs last father’s day and they were fantastic! Fall off the bone, not mushy at all. Yes, 10hrs is a long time, but my briskets take 16-26hrs depending on weight. I just dropped 3x slabs in the smoker 30mins ago for father’s day today. 4hrs in the smoker, wrapped, then finishing the rest of the cook in my house oven. Once you wrap, the smoking process is over, it doesn’t matter where your heat source is coming from (smoker or oven).
Thanks for the recipe
Tried this recipe and they came out fall off the bone.
Tried this with 3 racks of pork ribs, each seasoned differently: Jeff’s red rub, a pork spice combo, and salt and pepper. Did not cut them down to St. Louis style, but after 9 hours they were spectacular! Had some trouble maintaining a consistent temp on my Traeger so when we wrapped them as each rack hit 200* we put them into the oven at 175* for the last 5-ish hours. Again, the recipe yielded clean bone separation as promised – not mushy in the slightest! Most excellent!
I’ve made these close to 15-20 times. Makes for a long day but the final result has yet to disappoint.
Up here in Canada, winters tend to get somewhat bitter. When that happens, we’ve used a splash of liquid smoke and a couple ounces of orange juice when we wrap. I’ve yet to bite into any “mush”.
This has been our go-to rib recipe for a few years. Have some in the oven as I write this actually.
Could you remove the foil for the last 2 hours to add more smoke to the ribs?
I will be trying this recipe for tender ribs. Just a quick question; My smoker has a setting for 225 degrees or 250 degrees. Do I go down to the 225 or up to the 250 and change the times a little bit?
Thanks
I would just set it to 225°F (107°C) and the times should still be pretty close.
Running this recipe for the first time and I notice you don’t add any liquid or sauce at any step. Would it be bad to add some sauce towards the end?
Brian, It’s always okay to add sauce if that’s what you like. I do sauce when I”m feeling it, other times, it’s just dry rub. If you’re adding sauce, I prefer to do that about 30 minutes or so before they are done and that gives the sauce time to set.
Thanks for this recipe. I have a rack of St Louis style ribs that I’m going to try on a pellet grill using this method. What are your thoughts on using butcher paper instead of aluminum foil? Would it make any difference?
Paper works great although I haven’t tried it with this particular recipe. The paper breathes better than foil but still does braising pretty well.
Can you specify if the ribs are to be placed bone side up or bone side down at each step?
Marlon, I tend to keep the racks of ribs bone side down the entire time. The bone side is the side that had the membrane before it was removed.
I made these for a family get together on Saturday, with some fishing. Oh, man, these are an 11 out of 10. I followed the recipe, but needed to divide up the 2 full racks into smaller sections to fit into my Masterbuilt electric smoker.
The pecan/cherry mixture was excellent. I loaded the meaty side of the ribs with the Original rub, and I’m glad I went heavy with it. Fantastic bark.
I decided to try a little experiment, so when I served them to the family, I had a bottle of BBQ sauce on the table. The great news was that nobody went for it or even asked for some. That’s how this is supposed to work, and it did. Every rib that didn’t fall out on its own, took a 1/4 turn and out it came.
I’d never done this size smoking before, but it will happen again. Even the ‘I don’t like ribs’ people (yes, they are walking among us) ate their fill. It’s a real ‘project’, and well worth the effort. Yeah, I’ll do them again.
If your ribs *literally* fall apart they’re *literally* way tf over cooked!!!! Grow up…Don’t wrap your ribs.
-KC native in CA
If your ribs *literally* fall apart they’re *literally* way tf over cooked!!!! Grow up…Don’t wrap your ribs.
-KC native in CA
Grow up CC and don’t but into someone else’s likings.
This looks like literal sh**.
Thank you for your feedback!
While I suspect that you are a troll since you left a fake email address and fake name, this post gave me a good chuckle, so thank you for that.🤣
And just in case I’m wrong and you’re not actually a troll, Had you taken the time to read the 2nd paragraph on this page, you would know that this recipe is for people who LIKE their ribs super tender to the point of literally falling apart.. obviously not for people like yourself who like their ribs less tender.
By the way, I have plenty of other rib recipes that are cooked a lot less tender and leave bite marks when you eat them.
Great response Jeff! Used this recipe many times and it comes out just as advertised – “falling off the bone”! And I get a big ole kiss from the boss to boot 🤠
How presumptious of you to want to dictate what people like! My wife likes ribs that are fall of the bone tender and she gets tremendous joy when I make them for her. Grow up and get a life friend, and stay out of other people’s.
Here is a suggestion for a even better recipe. You only reference the temperature of the meat at the end of the process. I ended up with 212 degree meat after step two Please provide the approximate temperture at the end of step one. Obviously my time and temperature was not spot on. The meat registered 174 degrees after step one.
If I knew the temperature target, I could have made an adjustment from that point forward.
Nevertheless, thrilled to connect with your website.
10 hours to smoke ribs? I don’t think so
You can do baby backs in 5 hours and spares in 6 hours typically. This is a completely different process for folks who are looking for something a little special. If you care more about the time than the process, then do them the normal way and be done in 5-6 hours. Easy peasy!
Hi mate after wrapping do you keep the ribs bone side up or down
Jake, I typically keep the ribs meaty side up even when wrapping but I have been known to occasionally lay the ribs meaty side down on top of some butter, brown sugar, etc. to get that flavor and juices into the meat. Either way works really great in my opinion.
This is the most consistent process I have tried on spare ribs. I know what I am getting every time and it is always delicious. I heavily recommend making extra so the next day you can chop it up for some BBQ nachos.
Followed this recipe to the letter and these were the best ribs I’ve ever cooked. I used yellow mustard coating and Jeff’s original rub. Ribs in the fridge over night after they were prepped.. Used hickory pellets for smoke and held smoker at 230* for 4 hours. Removed and wrapped in heavy foil and into a 220* oven for 2 more hours. So delicious. My wife and I ate them without any BBQ sauce they were so good.
This is now my “GO TO RIB COOKING METHOD” :-)
We rarely use sauce on our ribs. (My opinion) if you gotta use sauce then it’s dry from cooking too long or to high or both. 🤠
I’ve followed a billion recipes for smoked ribs and this is by far the best. Me and my family thanks you.
Does this recipe work when cooking ona a traeger? Thanks
This works on any smoker including pellet smokers like Traeger.
Hey Jeff,
I’ve smoked about a dozen racks of St Louis ribs on my smoker before. They always turned out “ok”, smoky and flavorful, but they usually had too much bite to them and certainly didn’t fall off the bone. Out of frustration I did more research and found your approach.
I tried your recipe today, and I was blown away! amazing!! This will my new go-to recipe for all pork ribs going forward! They were so tender, and the fat was so rendered thanks to the tenderize step it was like soft butter.
In fact the results were so good that I’m thinking about whether I can apply this same paradigm to brisket and pork butt (i.e., add a long tenderize step after getting it to temp, then a stay-warm step at the very end). What do you think?
Thanks for the great tips!
Got a rack of very meaty beef ribs and used this recipe. Followed it exactly. Temp was 196 after 4 hour smoking and I got my new PitBoss down to 200 deg and then 170. Absolutely amazing beef ribs. Literally smoked bone side prime rib. Thanks for leading me on this adventure.
I have been using the Brinkman electric smoker for over 8 years now (9?). I guess they don’t make them anymore; too bad as they are so easy and convenient. Anyhow, since I discovered your website three years ago, your newsletter, purchased the recipe for your rub, EVERYTHING has turned out perfectly. Appreciate that you provide directions for traditional (wood/charcoal) smokers, electric, pellot, etc. I had never brined meat before but that has made all the difference between a very dry meat and a savory meat. My smoked meats are always a hit and I have to thank you for the recipes, tips and spot-on directions! I have gained so much confidence I even smoked an extra pound of quartered tomatoes last summer from the garden and smoked them, then canned them. Same for green beans! Amazing flavors depending upon the wood used. This is just so much fun. Thank YOU for getting me to this level!~!
After 40 years of cooking ribs have now just cooked the perfect “Fall A Part” ribs thanks to you and your rub. I purchased your rub recipes (well worth the money) and followed your instructions above as close as possible. I Did use our kitchen oven after wrapping them because it has a little better temp control than my Traeger but the results were amazing. I did want to ask about pork in general (ribs in particular) I know that with Beef it is important to get the best cut and quality you can find like a good grass feed beef cut, but with pork its not so much about what the animal eats but the size of the animal when butchered and how much fat it has. When it comes to the ribs is it worth spending twice as much at a butcher shop than what you would spend at a grocery store for a named brand packaged non seasoned St. Louis style ribs?
By the way I used apple wood for my smoke.
Dale, Thank you for the kind words!
I purchase most of the ribs that I cook at Costco or my local grocery store and in my opinion, they are just as good as the ones I have purchased at a butcher shop.
It is perfectly fine, by the way, to use the oven for any part of the cooking process that does not require smoke. Make it easy on yourself anytime you get a chance. ;-)
I have had great results with cooking at 250-275F. 3 hours unwrapped followed by 2 hours wrapped, rest for 30 mins. I then firm the ribs up a little on the gas grill on medium low and sauce. After the first 45 mins on the smoker I’ll start to spritz every 15 mins using apple juice and a little cider vinegar. When I wrap I’ll spray the ribs until they are not quiet dripping. And as always a water pan is a must. These ribs always go over well.
Can you post pics of how you wrap the ribs in foil
Do you cover the ribs while in the refrigerator?
As opposed to figuratively falling apart?
Exactly ;-)
Can I use this to cook ribtip to
Donald, I haven’t tried this method on the rib tips but it should work just fine.
Jeff, i tried your recipe for the smoked turkey breast. i followed the prep and brine from your book to the letter….except for the actually pan cooking, i also make my own bacon and save the ends and pcs for other things, this time i filled the pan around the turkey with the bacon ends….HUGE HIT! thanks for giving me the tools to make a terrific Thanks Giving meal! i really never thought you could get so much flavor from a turkey! looking forward to doing more recipes from the book!
Hello Jeff! This recipe sounds so good. My Wife is getting me a Camp Chef for Christmas, to use when I am not using my Masterbuilt. Can I get the same temps on the Camp Chef? I know you have to dial in the set temps.
Thanks for your help.
Hello Jeff. This recipe looks so good. Haven’t tried it yet though.
My wife is getting me a Camp Chef for Christmas and can I get these temps on this smoker? I know it has a dial on it to set the temps but I don’t know if you can get those exact temps.
I appreciate your help. Love your book and recipes.
I made these a few days ago and they turned out amazing. My only error was not starting them until the early afternoon. I was up until midnight waiting for them to finish. But the result was well worth it. I’m sure I will use this recipe again but next time I will start them in the morning.
Love your recipes! I’m not a competition smoker, just a backyard smoker…but i saw an article on Competition Ribs. The article said to mop a baste every 1 hour on the first 2 to 4 hours of smoking to keep meat moist during smoking. I assume it’s a light baste to not wash-away the dry rub. What’s your thought on basting during the initial smoking process?
Yes.. until the crust forms, you have to be careful to not wash the rub away by mopping. I prefer lightly spraying apple juice or some other basting liquid onto the meat.
I have also been known to use a turkey baster to periodically dispense liquid over the top of a piece of meat.
Made ribs this week for a family gathering using your directions for fall apart ribs. Used your tip for mustard coating for the first time. I used Black’s BBQ rub (sorry Jeff; I had it and wanted to use it up) which was very good. Also, followed your timing for the smoking. FANTASTIC!! Ribs fell apart. My brother-in-law ate two full racks. Actually, he was the one who requested ribs. The mustard worked wonders and didn’t flavor the ribs at all. My next ribs will use your rub. Your book is excellent as well. I use a Smokin’ Tex smoker which does a fantastic job of smoking everything.
Im just starting to use my electric smoker.But I would like the bones on my rib.I like to hold on to the bone and eat it.Whats my cooking time for the kinds of ribs.
Alisa,
The 2-2-1 method is what we normally use on baby backs which leaves them tender but the bone intact.
2 hours on the grate at 230°F with smoke
2 hour wrapped at 230°F (no smoke required)
1 hour unwrapped again, on the grate at 230°F (smoke if desired)
If you want them even less tender than this, you can remove time from stage 2 and add it to stage 1. For instance you might try 2.5-1.5-1 if the 2-2-1 is still too tender.
Can this “fall off the bone” method be used with baby backs?
Thanks
Absolutely but you’ll want to reduce the cooking time a little. The baby backs don’t have as much fat and they are usually not as meaty so they will reach this stage faster and you’ll want to be careful that they don’t dry out in the process.
Something like this should work:
3 hrs @ 230°F – laid on grate with smoke
2 hrs @ 230°F – wrapped (no smoke required)
1 hr @ 200°F – wrapped (no smoke required)
Check tenderness..and only perform the next step if necessary.
1 to 2 hrs @ 170°F – wrapped (no smoke required, check tenderness and moisture intermittently)
Thanks for the recipe rehash.
Always a nice reminder of recipes that can get forgotten.
Jeff, Does your rub or sauce contain any pepper type spices? Family member cannot tolerate any pepper spices. Thanks, Jp
Yes, it has black pepper and some cayenne.
Hi Jeff
I tried a different method this weekend to save time but getting ribs fall off the bone with a smoke taste. I cooked the ribs 20 minutes at high pressure in my Instant pot then smoke the ribs for an hour apply the sauce smoke for another 30 minutes. The meat kept his pork taste in addition to the rub,sauce and smoke
I have a Louisianna Smoker that utilizes a fan. Cooking times are quite a bit less with this. Is there a formula to adjust smoking times to this style smoker?
How do you set up the wood? I’ve heard about lava rocks on the bottom but I’ve always just used charcoal. Looks great can’t wait to try recipes!
Jeff-These are the ribs I’ve been trying to make!! I have a very basic Brinkmann electric smoker so ribs went on for 4 hrs with cherry smoke and then wrapped in foil for 4 hours. Used your delicious rub as I always do – no sauce needed! Outstandingly tender! I know this is not what’s done in competitions but this is exactly how we like them!! Thank you!!
I am a certified bbq judge and fall of the bone ribs are over cooked and will get you a low score you should leave a clean bite mark no meat on the bone at the bite and if the meat falls off over cooked. Rub the meat with your tongue on the roof of your mouth if it turns to mush no texture over cooked’
This website is not about teaching folks how to win competitions..it’s about teaching them how to cook the kind of things they love to eat. Whether we like to admit it or not, folks love their ribs “overcooked” and who are we to tell them they are not allowed to like them that way? Many of the competitors on the circuit have told me time and time again, what they cook for judges is not what they cook at home for their families and having tasted it a few times, I can certainly understand why.
Amen. Thank you. Had this thought of low heat holding for an extended duration creating fall off the bone quality when I went on vacation and noticed the spare ribs would fall off the bone at the local bbq shack at night, but the two following days at the same shack with the same pitmaster and lunchtime being the only changed variable. Thanks for being my validation mechanism. Now off to the store to buy 6 racks of st louis style spare ribs!
I realize this comment is 2 years late but I had to point out that the article clearly states these are not competition style ribs… and who cares?? make them how you like them. I’ve been trying to achieve this style of ribs for awhile now and am gonna try again tomorrow with this recipe (using my rub..sorry) hopefully they turn out “Fall off the bone” and not “competition style”
Joshua, best of luck on the ribs and, by all means, use the rub that YOU like.. I only offer options. The choice is entirely up to you😃
Dude,
Seriously, read the second paragraph of this recipe. It is clearly noted:
“Not your thing? No need to email me saying that this is not how spare ribs are supposed to be cooked. If that’s your paradigm, then you can ignore this recipe– no hard feelings =)”
I’ll say 9 times out of 10 when I have made ribs the person prefers the fall off the bone version. Every time I have made what you would call “competition worthy” ribs people tell me they liked the a previous smoke where they fell off the bone.
I was thrilled to get such a great rib recipe.
The 3,2,1 method is dead on. I let the ribs go one extra hour after I sauce and put them back on the smoker. Man they are fall off the bone good. And with some coleslaw and a cold beer, well we here in Vermont just love them. I wish I had a good thermometer its on my wish list. Thanks for the great cooking tips.
Any thoughts on smoking the ribs for the first 4 hours in the smoker and then finishing them of in the oven or maybe a slow cooker? Maybe even the next day?
You can definitely finish them off in the oven but you will not get the same results by finishing them the next day. All of the cooking time must be cumulative in temperature.
Jeff, what do you suggest we do for the trimmings on the Saint Louis style ribs? That seems like a waste, which keeps me going with baby backs. Any ideas?
I often season the parts I trim off and place them in the smoker with everything else. When they are done I freeze them and add them to beans, soups, stews, etc. for some great smoky, meaty flavor additions.
There is something to be said for a little “chew” when it comes to ribs but then there’s the melt in your mouth aspect some people can’t (or at least don’t) appreciate. I’ve achieved this a couple different ways. One on the smoker and the other actually in a slow cooker. Same prep as this recipe shows but 2 racks standing on edge curled up in the slow cooker at low for about 6 or 7 hours. Family said it was one of the best sliders they had. With Jeff’s recipes for rub (minus the heat for my wife) and sauce they were near perfection. If you try this don’t bother with liquid smoke, it almost ruins the flavor, better to leave it out. Great for winter time if you can’t fire up the smoker.