How to Cold Smoke Cheese
Smoking-Meat.com is supported by its readers. We may earn an affiliate commission at no extra cost to you if you buy through a link on this page.
Read this article without ads
I've been wanting to cold smoke cheese and since the temperature today was in the low 60's, I figured why not!
I had some already-sliced sharp cheddar and that was perfect for what I needed.
Here's my easy method for cold smoking cheese using a tube smoker filled with wood pellets.
- Prep Time: 10 minutes
- Cook Time: 3-4 hours
- Smoker Temp: <90°F
- Meat Finish Temp: N/A
- Recommended Wood: Pecan
- 20-30 slices sharp cheddar or your other favorite hard cheeses
- Pan/Rack (optional)
- Tube smoker (mine was cheap on Amazon)
- 2 cups hardwood pellets
- A smoker, grill or even a makeshift box to contain the cheese and smoke
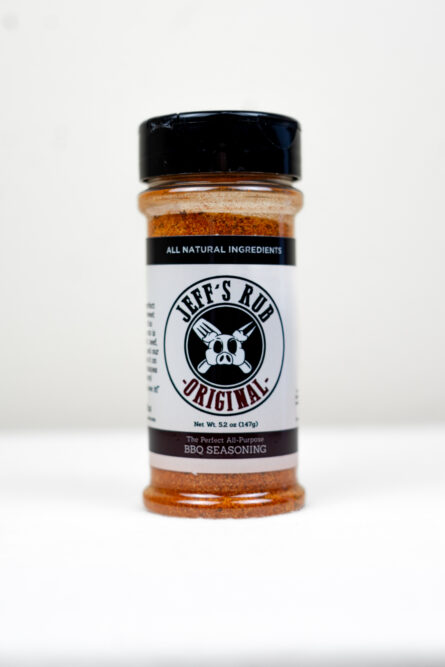
- Jeff's original rub
Here's some things to consider when you cold smoke cheese. Many of these list items were sent in by readers:
- Make sure the ambient temperature is low ( I usually only smoke cheese when it's in the 60's or below)
- Make sure the smoker is in the shade (The smoker can get hot in the sun, even if it's cool outside)
- Wear latex gloves when handling cheese to prevent oils and bacteria from your hands transferring to the cheese. This will stave off mold and help the cheese to last longer in storage.
- Zip top bags are ok for storage but a vacuum sealer is even better.
- Let the cheese come to room temperature before smoking it. A thin skin or “rind” will develop and protect the cheese while it smokes.
- I used slices but you can also smoke larger pieces if desired.
- I used pecan pellets but the “more common” competition blend pellets are also perfect for cheese
- The 2 week aging process at the end is the minimum. 2 months is better.
I had all of these slices of sharp cheddar so I just laid them out on my pan/rack in neat little rows.
Feel free to be more “freestyle” with it if you so choose.
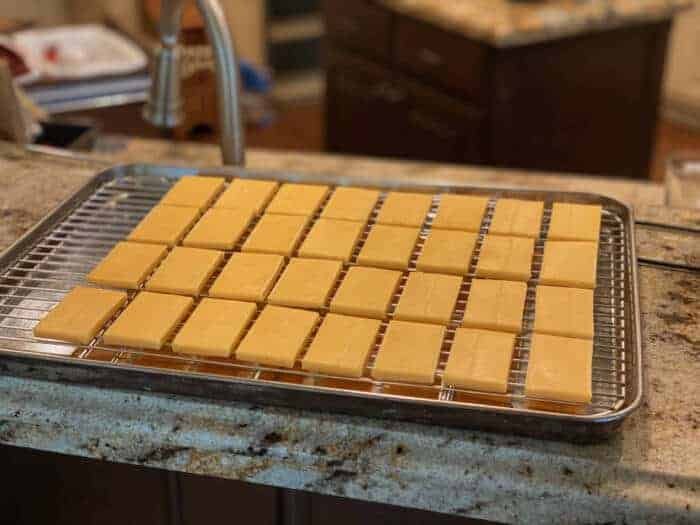
You could also lay the cheese directly on the grates of your smoker or grill but I thought this would make it easier.
There's a ton of these smoke tubes on Amazon and you can even find them in stores that sell smoke/grill supplies. I have “loaned out” all of my trays and tubes that are made by A-Maze-N smoker (the ones I usually use) so I was forced to use this cheapo tube smoker that I got on Amazon.
I filled it with pecan pellets and laid it on the left side of my RecTeq smoker, right next to the probe inlet so it could get plenty of air
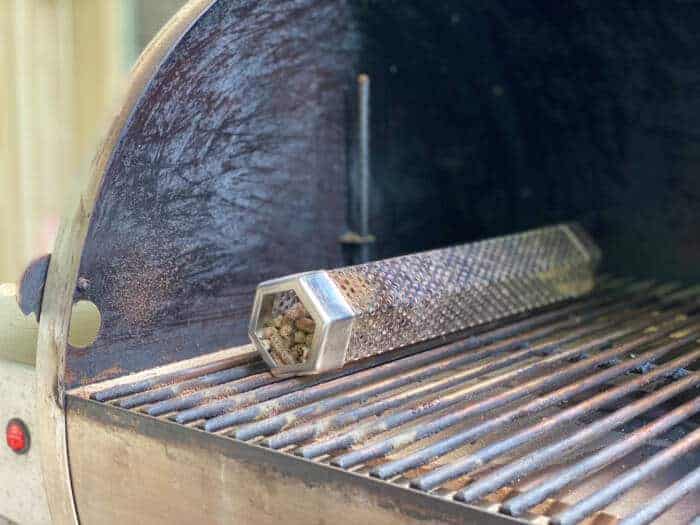
I used my butane torch to light it until it was burning on it's own
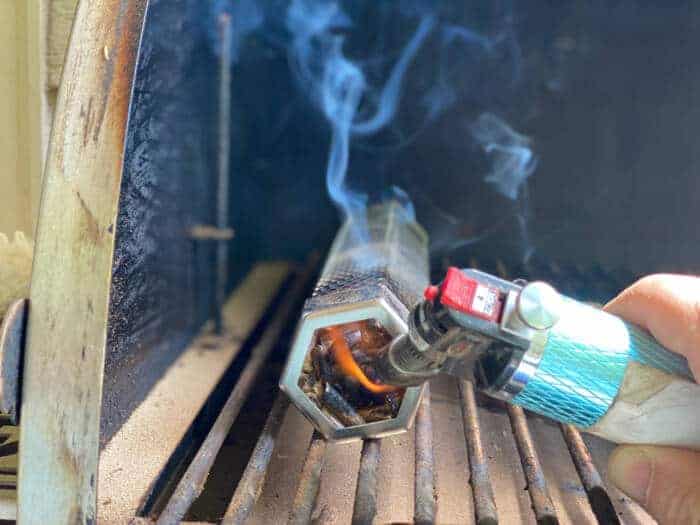
Then it should be allowed to burn until it goes out, a couple of minutes usually.
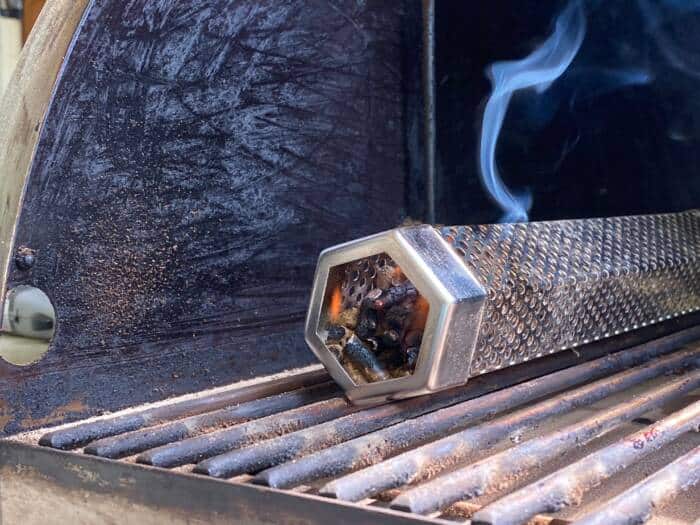
This creates a “cherry” of coals that create smoke as the pellets smolder and it slowly works it's way from front to back creating smoke for several hours.
Once it's going good and the smoke is producing steadily, the cheese is ready to go on the grates.
Lay the rack of cheese directly on the grates of the smoker or grill you are using.
Note: The smoker or grill is not turned on or lit.. it's just an enclosed space to house the cheese and the smoke.
Man, look at all that smoke!
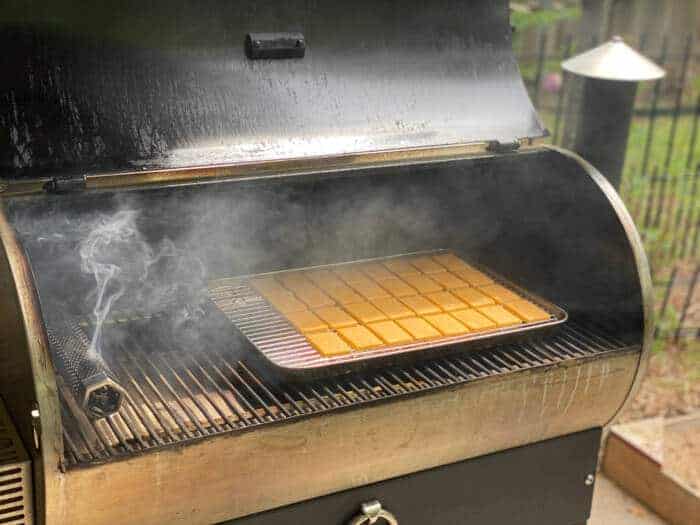
If you don't have a smoker or grill, you could also use a makeshift box with a hole cut out on the side for air. The tube would need to be elevated a little so it can get air all around it and far enough away from the sides of the box so it could not cause a fire. It's not ideal but it could be done.
I chose to use the RecTeq pellet smoker as my host.
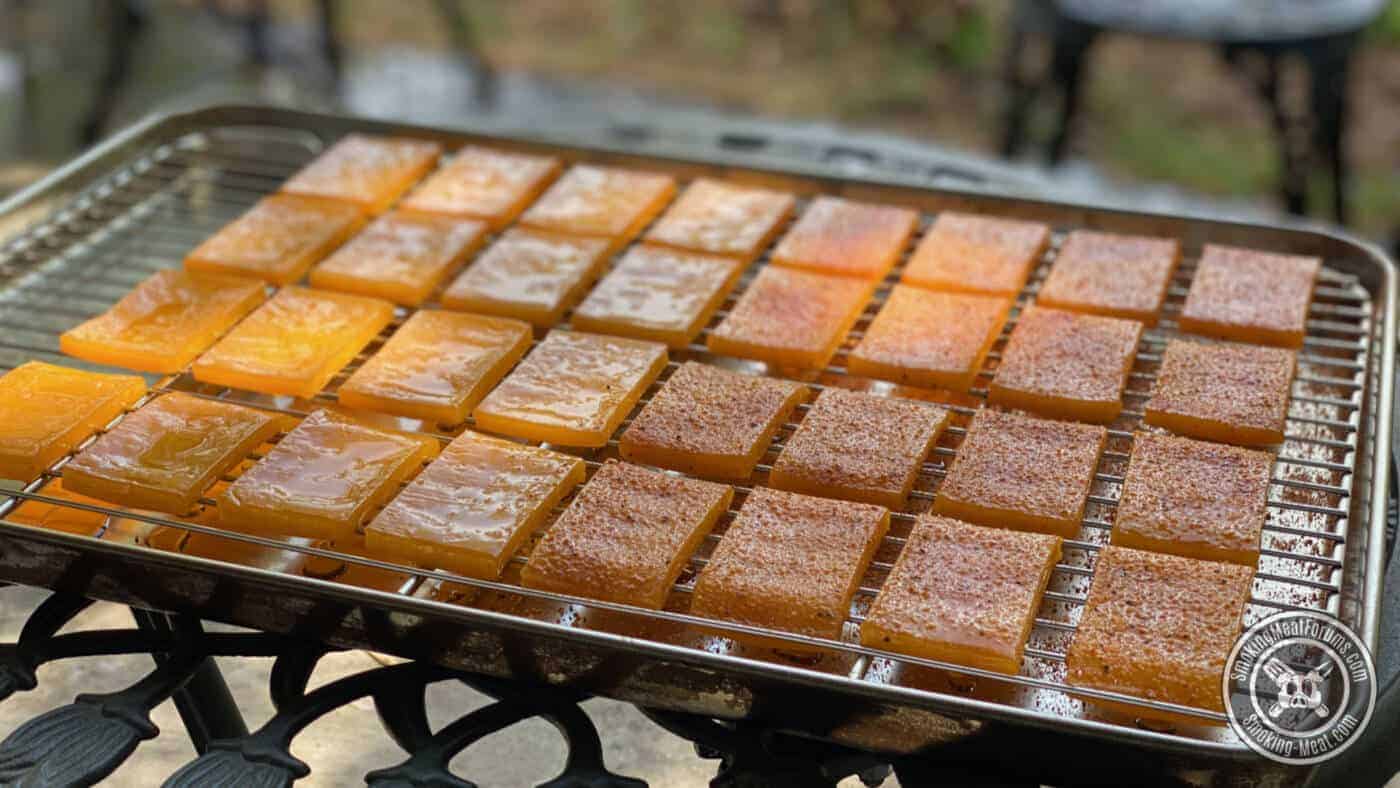
Once the cheese has been smoking for a couple of hours, feel free to add a little original rub to the top of the cheese. I had not tried this before so I added rub to half of the cheese. (as it turns out, I should have put rub on every one of them 'cause it was good!)
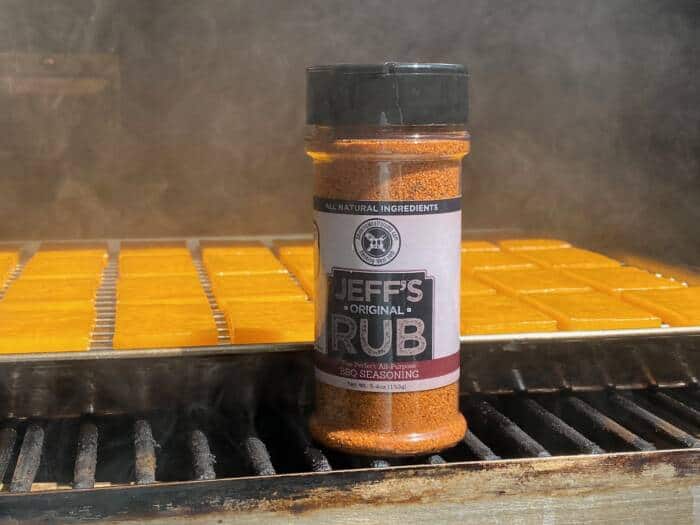
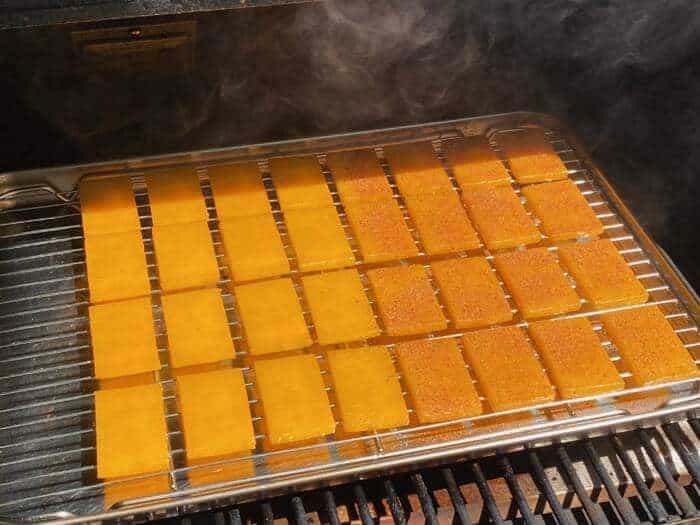
After the cheese has smoked for 3-4 hours, it will have a brownish tint to it and this is visual clues that the smoke has done it's thing.
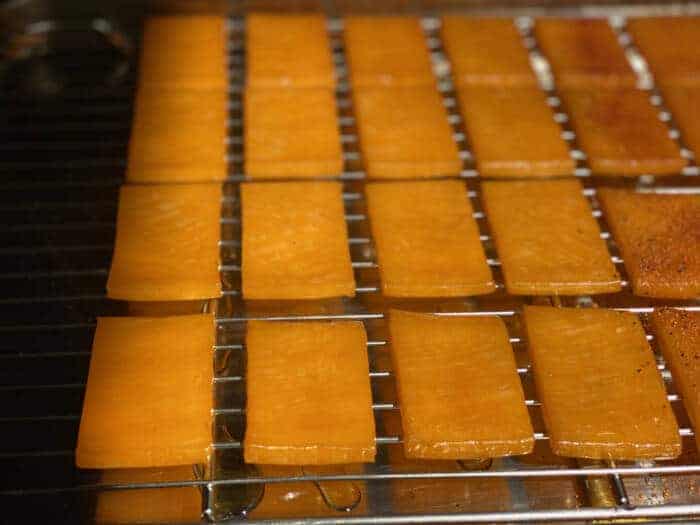
Bring the rack of cold smoked cheese into the house and set it on the counter to cool.
How Long To Cold Smoke Cheese?
Some folks smoke for longer times, others shorter times and this depends on a number of things
- How much smoke flavor you like
- How strong of a smoke wood you use (alder vs. hickory, etc.)
- How much smoke is being produced
I usually just use one of the pieces as a taster and take bites of it until it gets to the level I like.
The smoke tube was getting to the end of it's pellets by the 4th hour and fortunately the smoke was tasting perfect about then as well.
After the cold smoked cheese has cooled for a little bit, place it into zip top bags and place it in the fridge for 2 weeks to “age” and sort of mellow out.
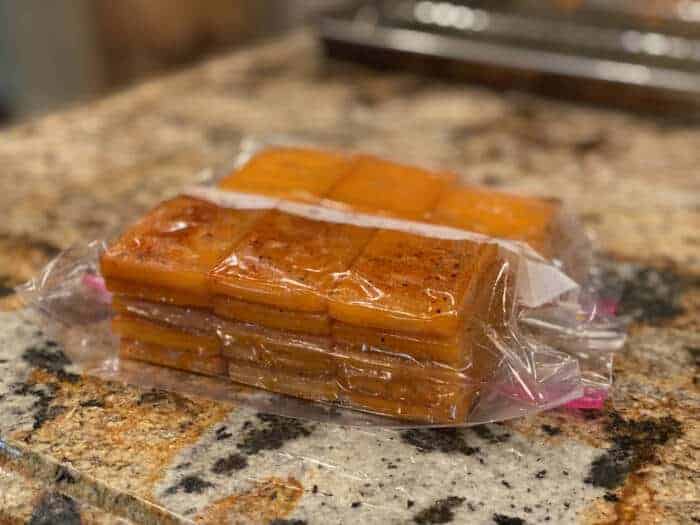
During this time the smoke moves from the surface of the cheese and absorbs more into the cheese. This makes it more mellow and it will definitely taste better after this waiting period.
Be sure to write the finish date on the bag so you'll know when it's ready to eat.
What if the cheese sweats? This sometimes happens and is often due to the cheese getting a little too warm or if you place the cheese into the smoker when it's really cold. I don't worry about it too much. I am much more concerned that it doesn't melt.
Can I smoke soft cheeses? You can but it's important that the smoker stay really cool. For this we often use ice or just do it on a day when it's really cool outside.
Help, the cheese tastes like an ashtray! This is what I've heard many times. Place the cold smoked cheese into a zip top bag as mentioned in the method above and let it spend at least a couple of weeks in the fridge just mellowing out. This will often do the trick.
This may also mean that you prefer cheese that is less smoky. Make a note of this and next time, cut your smoke time in half and use a milder wood such as apple or alder.
How to Cold Smoke Cheese
Ingredients
- 20-30 slices Cheese (hard (sharp cheddar used in this recipe, use your favorite.))
- 2 TBS Jeff's original rub
Instructions
- Arrange Arrange cheese slices onto a pan/rack. Be sure to leave a little space between them.
- Fill and Light Fill a smoke tube with pellets then lay it on the grate of a smoker or grill right next to an opening or hole so it can get air. Light it using a butane torch. Let it burn until it goes out.
- Smoke Place the rack of cheese on the smoker/grill grate.
- Season After about 2 hours, sprinkle Jeff's original rub on some or all of the cheese if you desire (it's really good).
- Finish When the cheese has smoked for 3-4 hours, it's finished and can be brought into the house to cool on the counter top.
- Age Place the cheese slices into zip top bags and into the fridge for 2 weeks to "age" or mellow out.
Notes
- Make sure the ambient temperature is low ( I usually only smoke cheese when it's in the 60's or below)
- Make sure the smoker is in the shade (The smoker can get hot in the sun, even if it's cool outside)
- Wear latex gloves when handling cheese to prevent oils and bacteria from your hands transferring to the cheese. This will stave off mold and help the cheese to last longer in storage.
- Zip top bags are ok for storage but a vacuum sealer is even better.
- Let the cheese come to room temperature before smoking it. A thin skin or "rind" will develop and protect the cheese while it smokes.
- I used slices but you can also smoke larger pieces if desired.
- I used pecan pellets but the “more common” competition blend pellets are also perfect for cheese
- The 2 week aging process at the end is the minimum. 2 months is better.



This recipe is absolutely wrong. Cheese should be “cold smoked” meaning it shouldn’t be brought up to temperatures above the mid 40’s Fahrenheit during the entire smoking process. Above that, and the cheese melts. Those melty clearish/glossy looking pictures of cheese in this post are showing melted cheese, not smoked cheese with a “rind”. That melted cheese will be dry and tough after cooling and being placed in a fresh saver or freezer bag. Let me ask you, have you ever purchased a smoked cheese that looked like that? Smoke cheeses on cold days over a smoking pellet tube with diffuser and a tray of ice water over the smoking tube and the cheese being rotated every 20 minutes. After an hour and forty minutes to two hours, you can remover your cheese, let it cool, and vacuum seal. To vacuum seal, after cheese has cooled in a refrigerator, wipe off moister and seal in a fresh saver bag using custom sealing to get the plastic tight, but not squeezing the cheese. Place the sealed cheese in the refrigerator for a minimum of 2 months, but serve within a year and a half maximum. If you taste it early, it will taste like a block of cheese rolled in an ashtray. If you wait the two months for the smoke to permeate the fat layers of the cheese, you will get wonderfully smoked cheese. The color on the outside of the cheese is extremely subtle. You don’t need the cheese to be darkened for the flavor to permeate. Be patient and it will be worth it.
Thank you for the feedback!
I put my smoke tube under the drip pan and the tar from the smoke fried the electronics of my pellet grill/smoker. There were runs of tar from the smoke on the bottom of the drip pan. I don’t want to destroy another grill. I’m going to try the smoke tube on the grates alongside the cheese. Any advice appreciated, especially concerning not destroying the electronics of the grill with the smoke.
Can you let me know what pellet smoker you have that was damaged by the smoke?
I’ve been placing the smoke tube on the grate of my pellet smokers for years with no issues. I like to put it on the grate right next to the probe opening on the side, if yours has one. That allows it to draw plenty of air, and you shouldn’t have any issues that way.
Also make sure your vents that allow the smoke to escape are not plugged and they are open at least ¼ of the way if they are adjustable.
I Have a ZGrills 7003 pellet grill. I think the mistake I made was putting the smoke tube underneath the drip pan. I’m going to give it another go but this time I’m putting the smoke tube on the grates next to the pan of cheese.
It does have a an opening to put your probe wire through on the left side however, there is a rubber grommet to seal it so it’s not wide open. The exhaust side is wide open and doesn’t have an adjustment.
I found that the Napoleon pellets burned out after 20 minutes or so. Then a ten minute delay until the next batch of pellets started smoking. Next time I will add pellets before the smoking stopped.
I prefer the heavier smoke flavor so I went 4 hours, and I didn’t use a rub – just cheese and the smoke. Championship blend pellets. Everyone in my family is raving about it.
I put my cooling rack of cheese on top of a foil pan filled with ice, then into the smoker. Pretty much followed as written. Will have to try putting some rub on the cheese. Sounds intriguing.
I’ve found the best and cheapest smoke generator is a tin can, some wood chips or dust, and an old soldering iron. Even if buying new it’s under $10. I stick the cheese, can and iron in my propane smoker (use any grill, smoker as box). Plug it in and walk away. I go out every 1/2 hour or so to turn cheeses and shake can as it burns. Perfect cheese after 2 hrs. On a 60 degree day the smoker pretty much stays 60.
Jeff, where to begin. So many errors, so little time. I’ll just hit a few highlites.
Temp in the “60’s”, is wrong. 60°f is way to warm. That’s not a rind its forming, that’s a dried crust. Your cheese should NOT turn brown, again, too warm. 60 is maximum, including the tube burning. Place tube under deflector. Try it late night, as temps drop. I make cheese in warmer weather, in a running refrigerator. I sell a LOT of cheese. Colder is better,30’s are my fav.
Surface area Is king, cut your cheese accordingly ,and FLIP cheese about an hour in. Theres a reason it’s called COLD smoke. I’ll stop there, but theres so much misinformation out there, MOST think the have the smoker running. Not even the fan should be on. Let me know if you want to learn the process a little better.
Mike, fortunately, there’s more than one way to do things;-)
The most valuable lesson I’ver learned over the years is not how to smoke cheese, meat, etc. but rather how to give people basic guidelines and then let them tailor those things to the way that they like it.
Your way may not be the way that I do things but if you like it that way and it’s not unsafe, who am I to say it’s wrong?
I smoke cheese all year and while there are definitely ideal conditions, I smoke when it’s not ideal and that’s what outdoor cooking is all about.
I appreciate you sharing your method.
I use the full 8oz blocks and Kraft is best, Crystal Farms second best. Most store brands aren’t too good. I use the Amaze-n-smoker tray (basically 3 HOURS PER ROW, 3 rows, and you need 9 hours to smoke a pork shoulder on a cool day or overnight but MUST be done when temps are COLD or your meat will start to spoil) but the tube one is fine too. I have both. I set either on an angle to raise the light hole side a bit for the 10 minutes it needs to actually burn to start the pellets.
I’ve smoked the shredded extra sharp cheddar too, works fine, but smoke for about 1.5 hours vs 3 the first time. You can test before you yank em and if you want more smoke, just let it go. They will MELT easier too, so again, do it on a 60 degree day.
I have used a large torch lighter like Jeff showed, BUT they get HOT and I don’t know but explosion is an outside possibility I’d guess. They’re cheap so I don’t trust them. If that detonated it could really hurt you. Best to use your simple blue plumbers propane torch!
Much more flame, reaches deeper into the pellets for a better, faster light. I tried the little square tasteless fire starting blocks once and that is NOT a good way to light pellets, even when you just use a little corner of one pinched off. So don’t bother. Been tried. GREAT for lighting wood in the burn pit though, and waterproof.
You can get the entire blue propane torch at any major hardware store for like $12-14 on sale with a manual flint lighter, and the blue refill propane tanks are just $3.50 and will do many pellet tray/tube lights for you. Always have a spare, full blue propane tank or 3. No explosion risks either and can be used at lots of different angles. You do NOT need to crank up the flame on the blue torch either. Just a mild, gentle flame is adequate, and conserves the gas. You DO NEED to let the fire on your now lit pellets GO and BURN for 7-8 minutes, and protect from wind so it doesn’t go out. THEN you can blow it out if it’s still lit, put the lid on your smoke box and let er rip!
I use apple for about 3 hours and as Jeff mentioned, it iS possible to over-do it but everyone’s taster is different, so keep track the first time of smoke time and adjust accordingly next time. As for me, if I wanted a little more smoke I prefer just using the mild apple but extending the time a bit – versus stepping up to the slightly stronger Pecan pellets. Use the wire smoking trays for good smoke pass through.
Smoke cheese in the cooler part of the day, BUT when using my Brinkman smoker shell for the smoking, the pellet smoker tubes or trays ONLY RAISE the temps inside about 15-18 degrees on a 60 degree day depending on wind – or so DEPENDING on the outside temp! The blocks of cheese stay that shape just fine so long as you keep the temp under about 80 – 85 degrees. Don’t try to smoke cheese on a 95 degree day, of course. With the smoking pellets you would melt your cheese and then it’s worthless as the oils separate. Pick a rainy cool day or make a BIG batch in the cool spring or cooling fall, VAC SEAL, and it will last most folks for some time.
Two differences, while a zip lock is perfectly fine for short term storage, I’m single and smoke 6-8 blocks at a time and won’t eat them fast enough for zip locks, so I vacuum seal them. Good for 6 MONTHS in the basement fridge. (Don’t freeze… flavor is fine thawed but it changes the texture of the block of cheese and it doesn’t want to slice and stay together as well is all. For some uses this wouldn’t matter at all, like crumbles for salads or use in soups. For those, you could freeze your smoked blocks of cheese and freeze for a year! )
I mark the vac bags with a sharpie as to what kind and flavor of cheese is inside, and date it. When smoking, you can simply put half a toothpick in one brand of cheese and none in the other, so you can ID them after smoking, if trying more than one brand of say, extra sharp cheddar that day.
The vac sealing also changes the pressures inside the bag and “pulls” the smoke into the cheese a bit, a plus.
I don’t use the Traeger pellets, and found some that are better, and half the cost AND about 5 more pounds per bag. A win-win. A HEAVY bag on sale was only $10. Lumber Jack brand and Fareway grocery stores and many Feed stores have them. They make a 100% kind, and a regular kind, and the 100% kind INCLUDES the bark of that tree IN the pellets, and lots of tree oils are in that bark. You can go to their web site and look around.
I love Jeff’s site and recipes and always look forward to the new one in my email box. GOOD WORK, Jeff!!!